Drupal Views
The Drupal CMS’s internal logic means that the MySQL database holds pretty much all text-based site content (as outlined in the Drupal Overview that opened this section). The codebase provides the scaffold, the filebase holds images and other files that can’t go in the database, and the database holds text content, metadata, site configurations, user data, and everything else. This setup means that a database query tool that can sift, sort, present, and re-present content from the database is an incredibly powerful tool. This is Drupal’s core *Views function.
Views, most simply, allow you to manipulate the fields in Drupal’s (MySQL) database to display and combine content in functional, novel, interesting ways. Everything that has preceded this page in the Drupal tech documentation will be prerequisite to understanding and manipulating Views; if you haven’t read these preceding pages, you should do so now (start here).
The anatomy of a view
You can see all views on the Drupal site by navigating (in the admin menus) to Structure / Views. Some views are user-created, while others — notably, those that control admin menus, like “Content” — ship with Drupal core. You can create new views or edit existing ones from this page. You can also edit a view that exists (as a block or a page) anywhere on the site by clicking on the contextual icon.
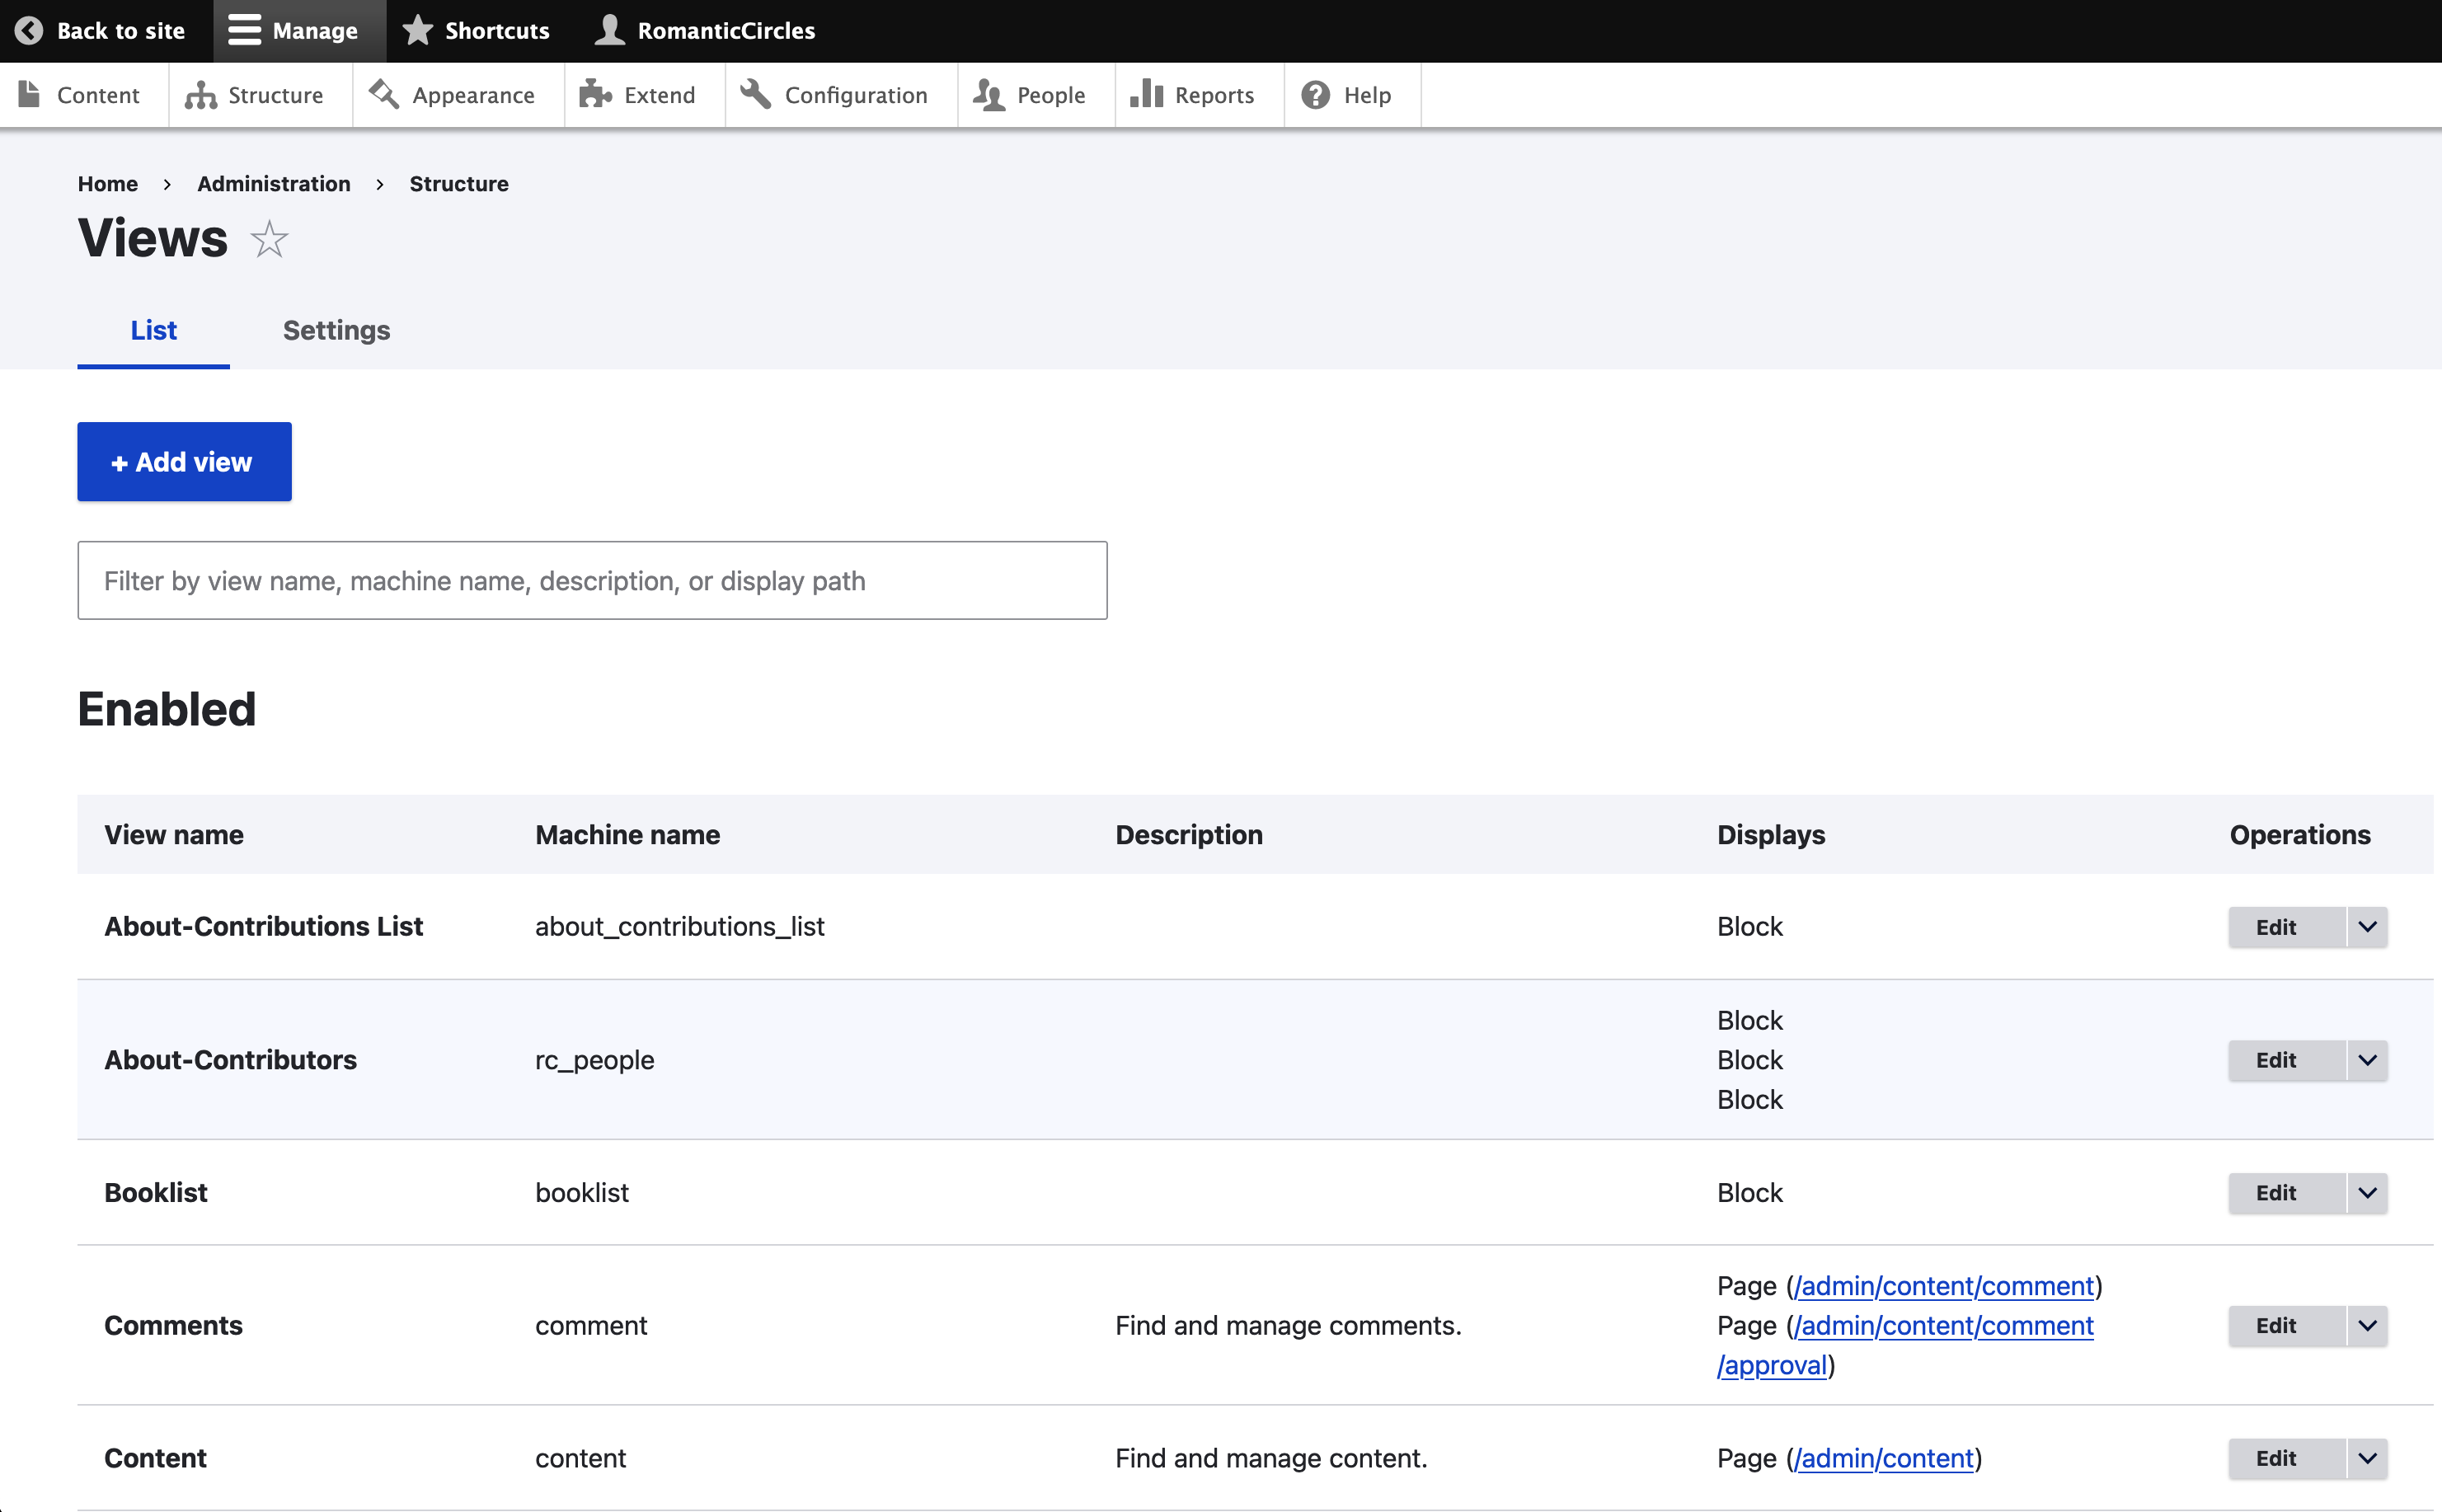
If an element on the site is generated by a View, its contextual “pen” icon, when clicked, will show “Edit view.”
When you edit (or create) a view, you’ll find yourself looking at Drupal’s Views builder interface. Let’s quickly tour each of the elements of this interface.
Note: If you create a new view, a sort of “view builder wizard” will get you started, but you can change all the configurations it automatically sets up when you actually get to the Views interface proper. The options on the new view wizard likely won’t make much sense until you read the guide below.
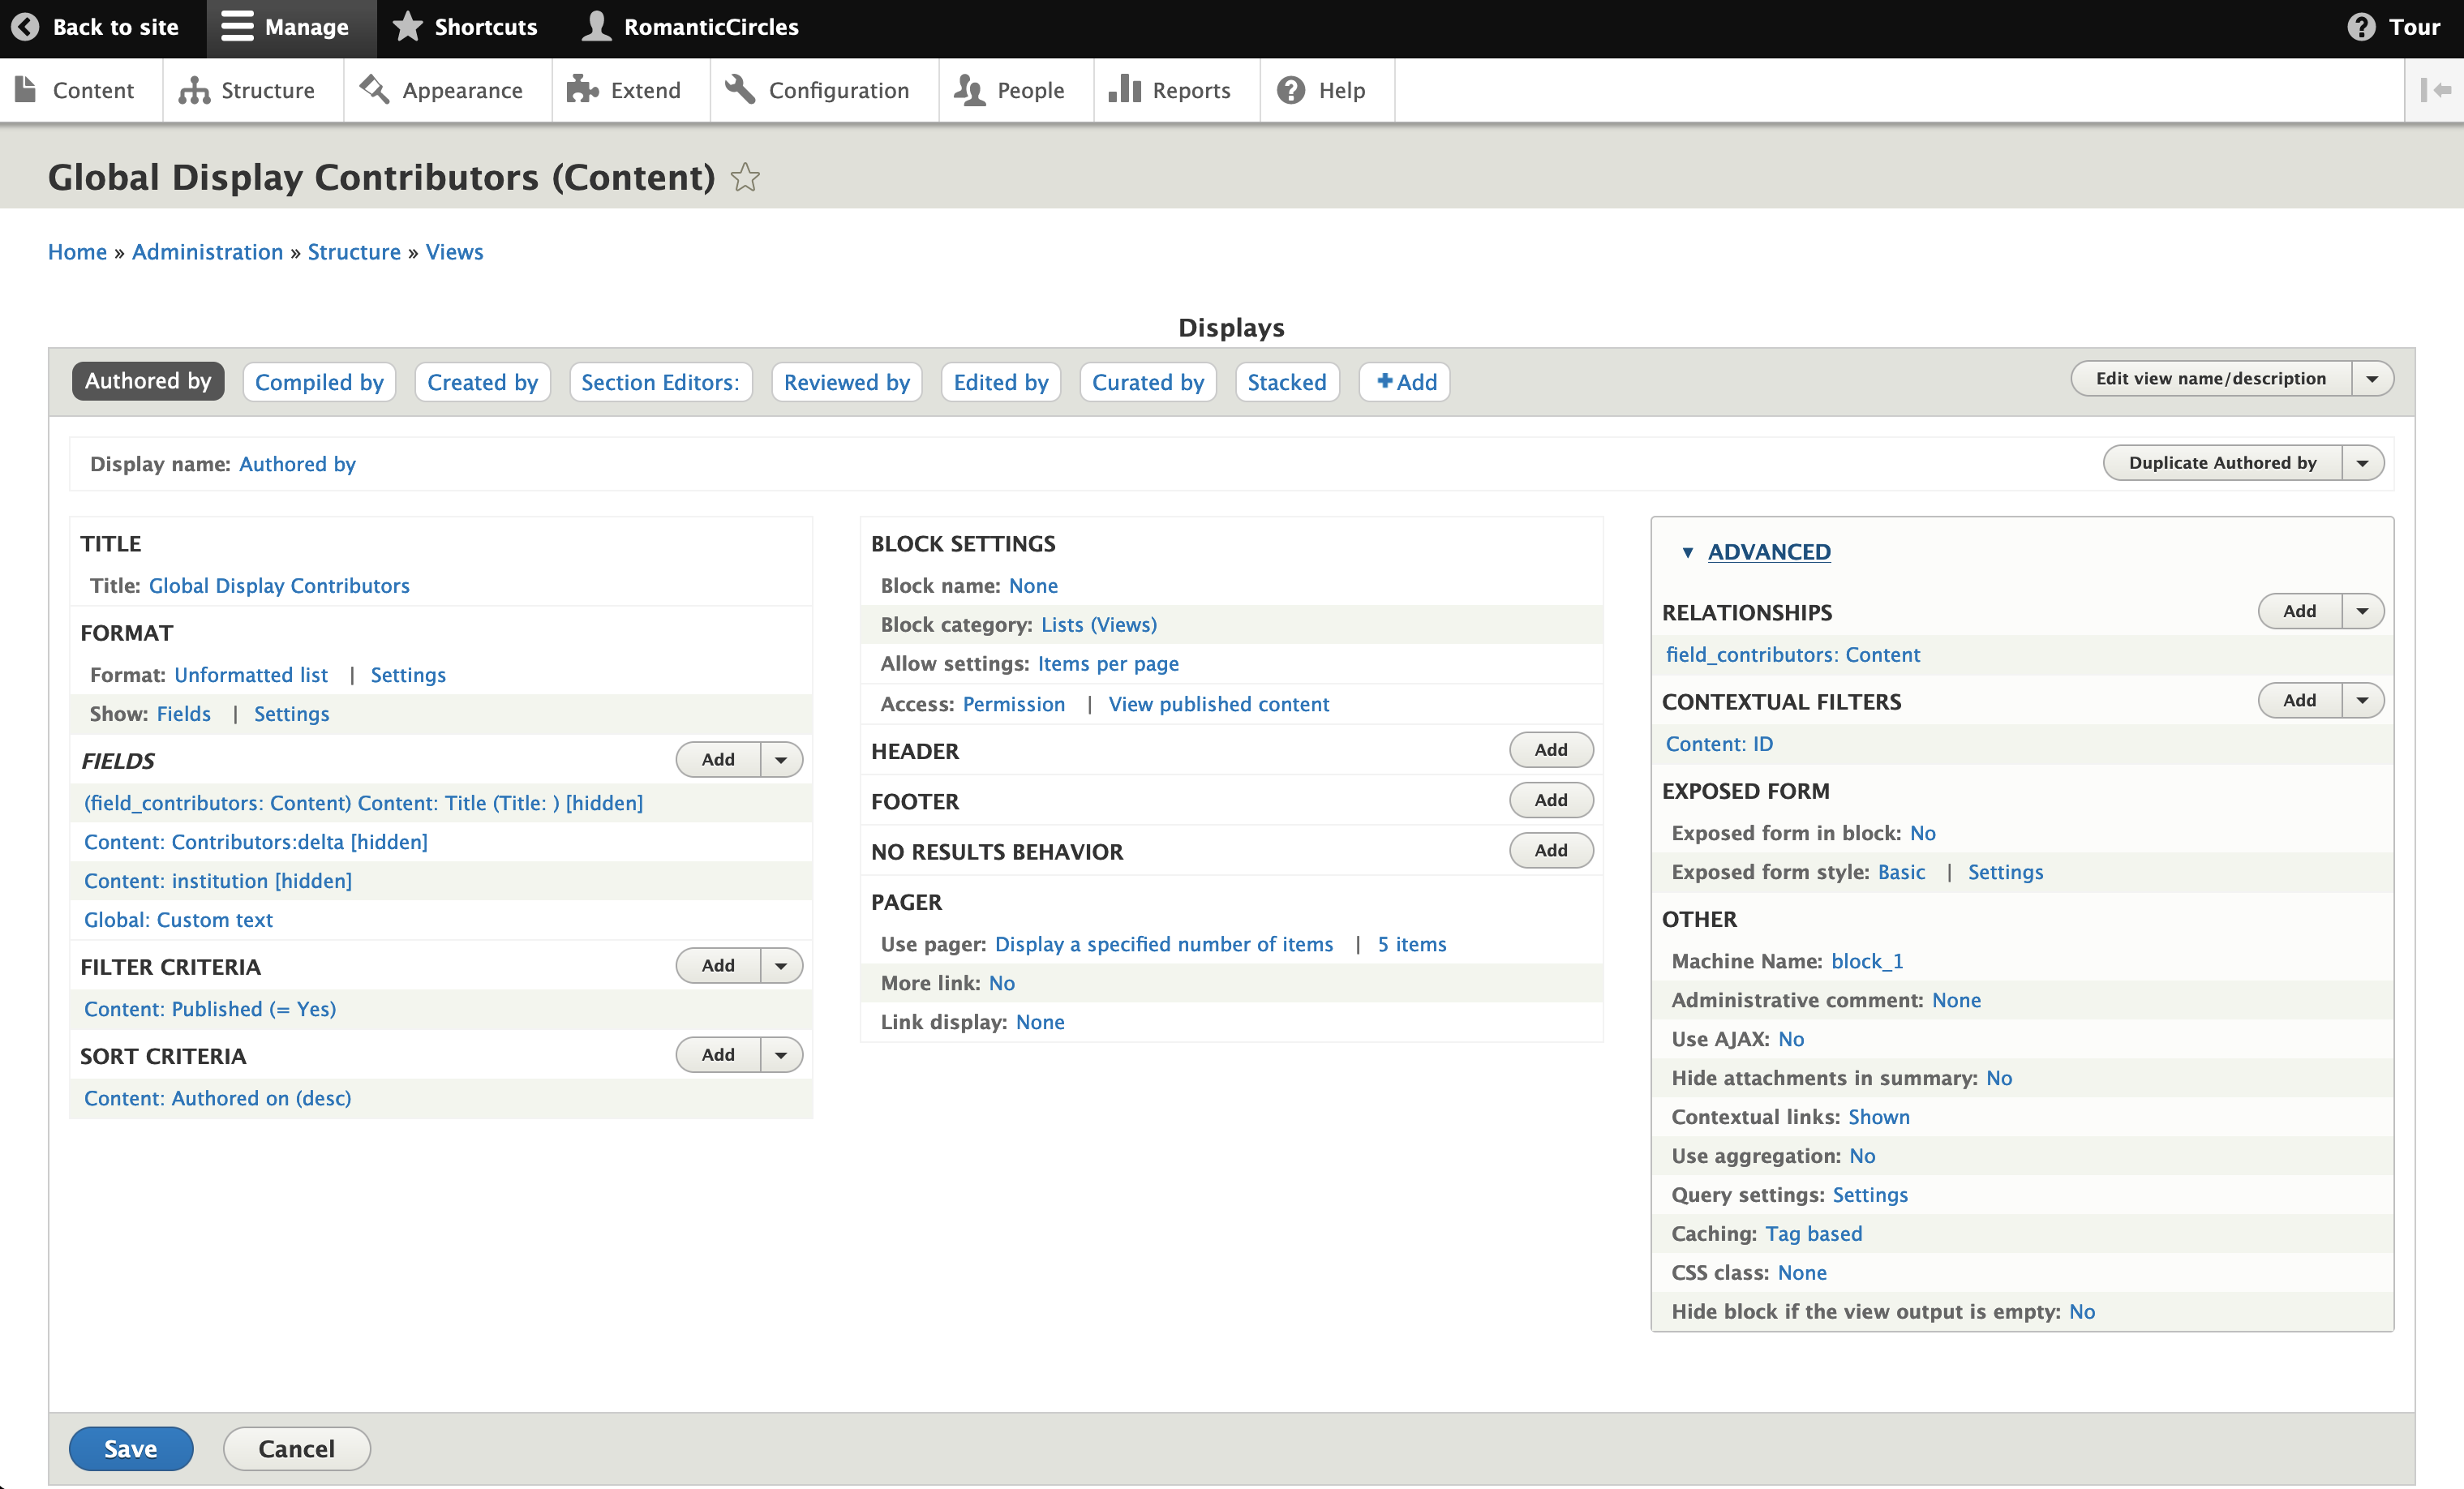
Displays
Each view can have a number of displays. Each display sets a separate output for the view; this can allow you to, for example, create a view that outputs a different display for nodes of a specific content type based on filtering by a tag; see, e.g., the “Lab Pop Culture Teasers” view, which has different displays based on the genre of a piece of media (Film, Literature, Television, etc.).
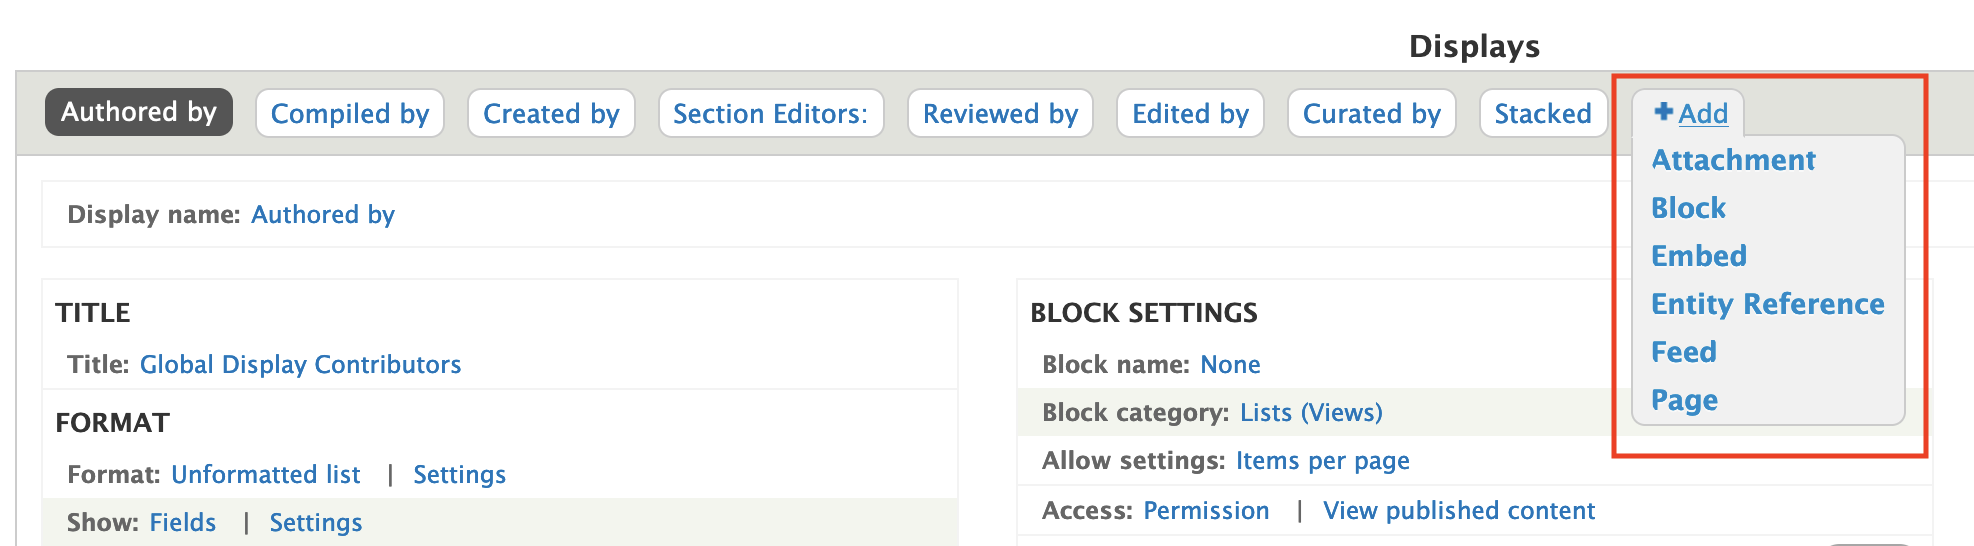
Drupal gives you several display options when you create a new view or click to add a new display to an existing view: attachment, block, embed, entity reference, feed, or page. Luckily, the RC really only uses two of these: block display and page display.
These displays do exactly what you’d expect: the “block” display puts the output of the view’s database query as a block (an element that can be added to a node / page), while the “page” display uses the output of the view to create an entire page and allows you to set its path. These two display options result in different settings options, as covered below.
Note: In principle, you could build a new view for the RC site that leverages the functionality of the attachment display, which essentially just creates a new output that “attaches” to the view’s main output (block or page) and displays some variation on the view alongside/above/below it. You could also create a complex view that leverages the entity reference display; for an idea of how this might work, see this documentation from Drupal. You’ll never, based on the Drupal build, use the embed or feed types on the RC site.
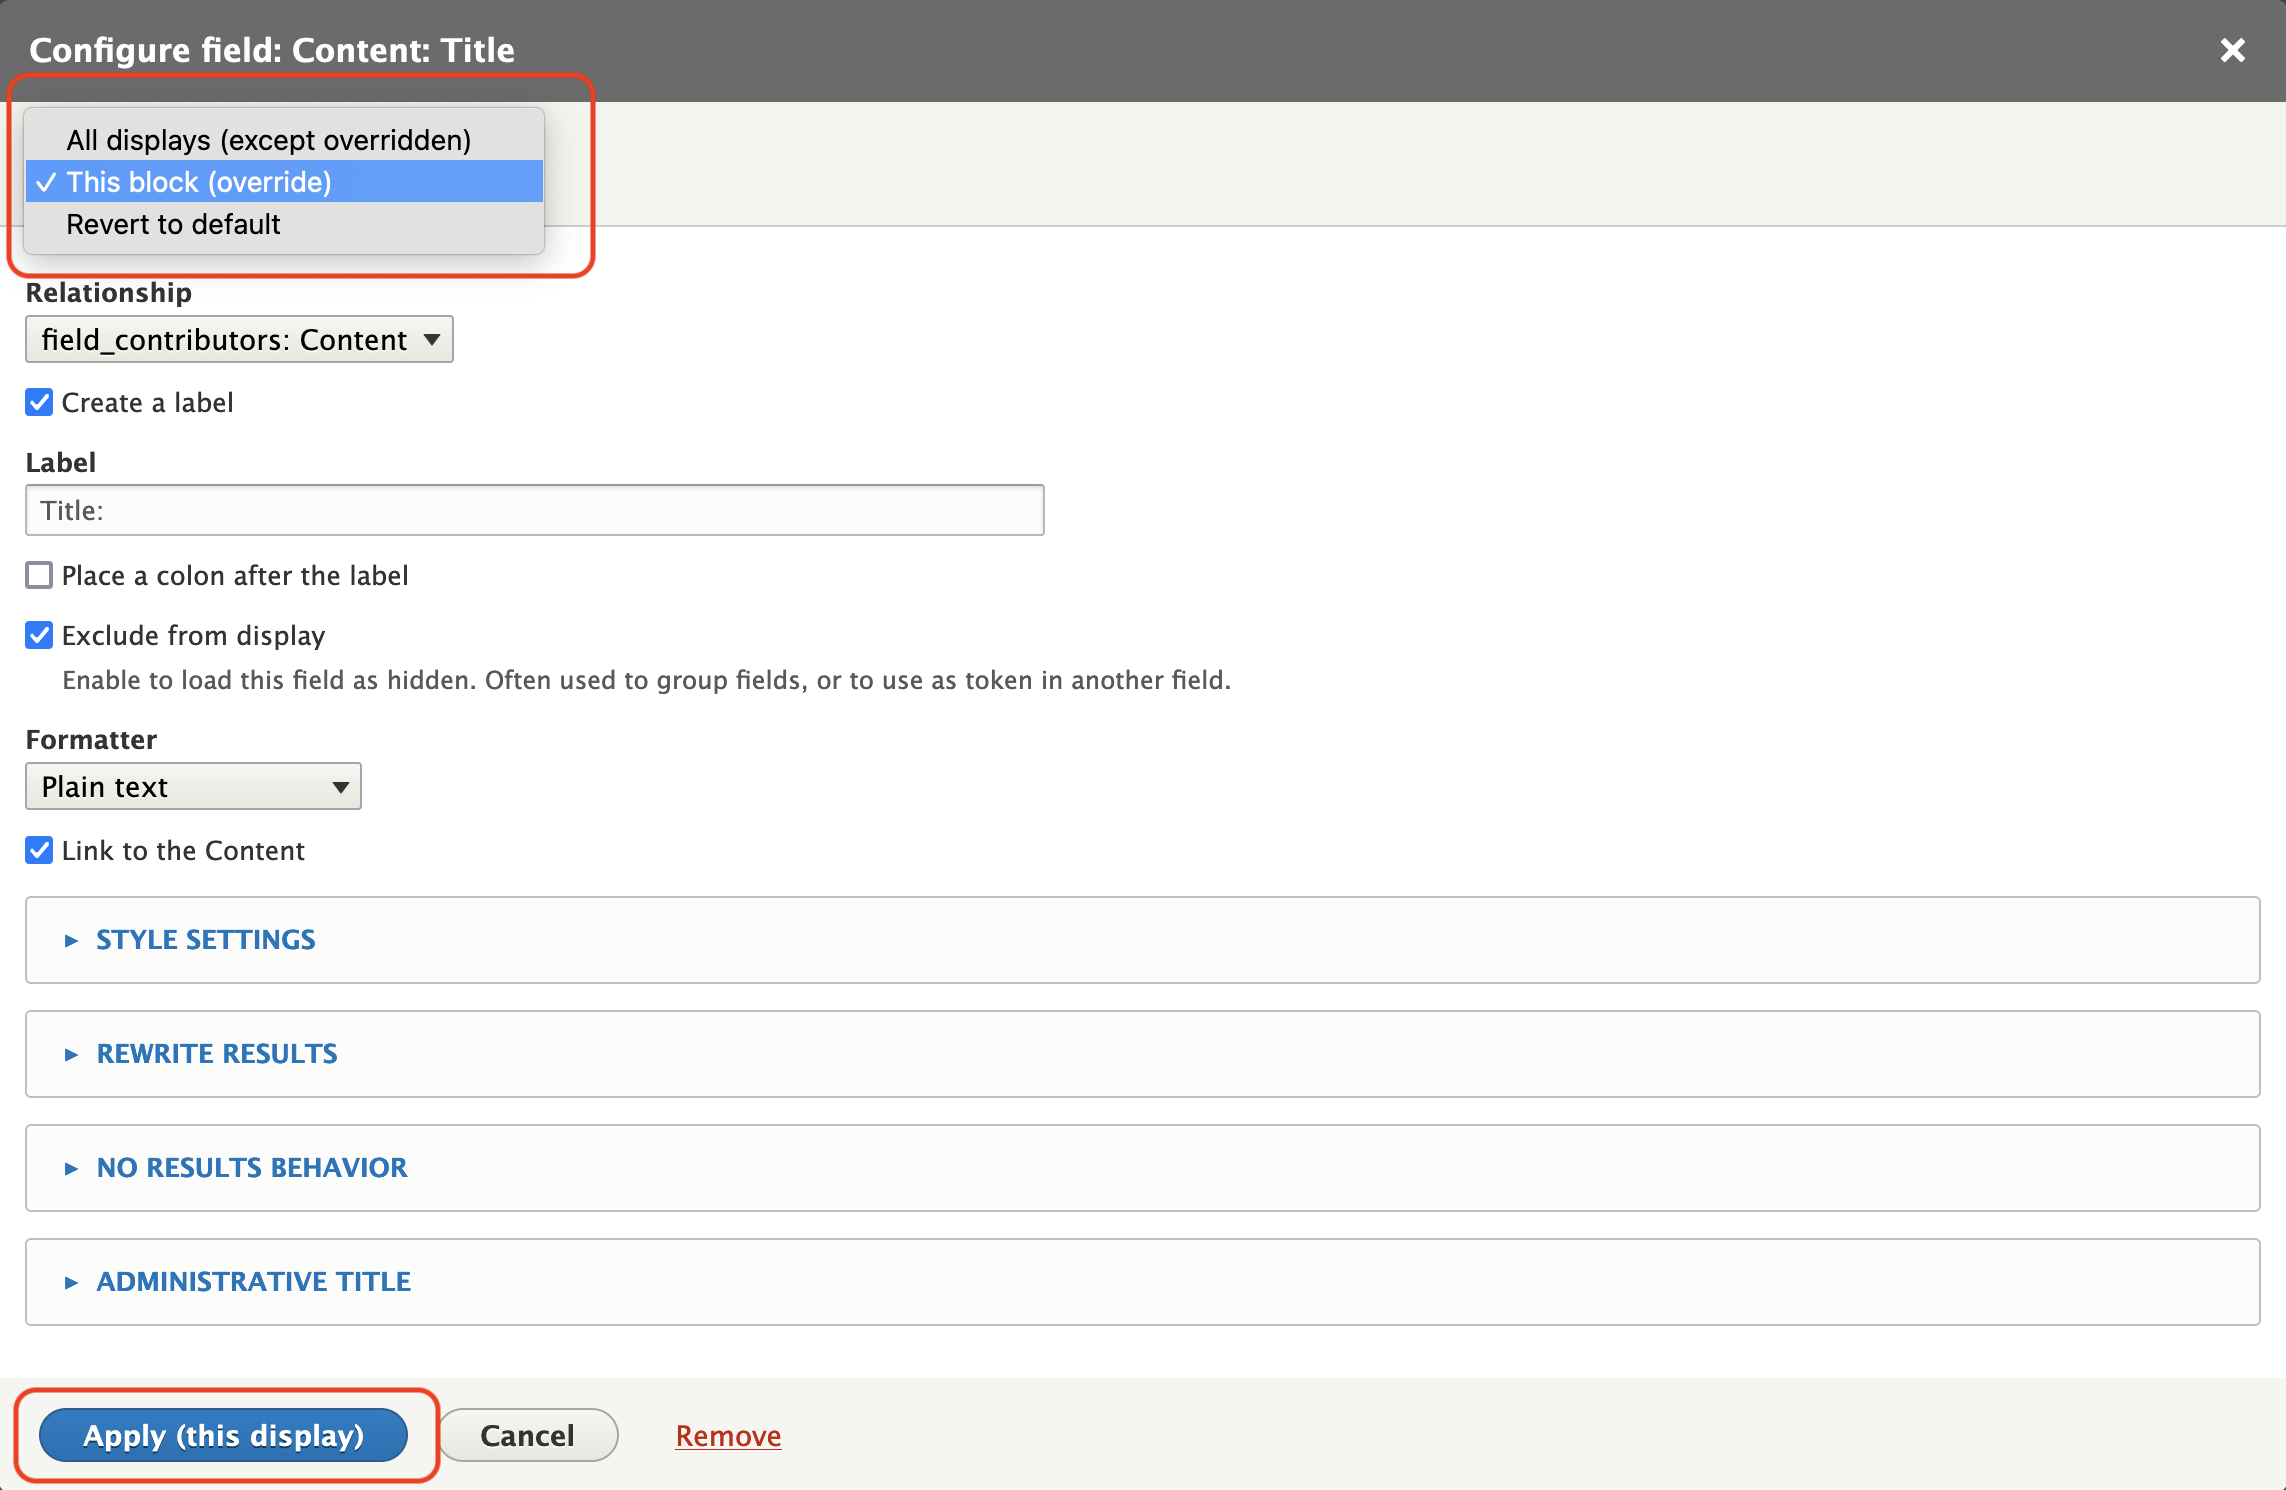
**IMPORTANT!** If your view has multiple displays, any edit you make to a display (block or page) will either be applied to ALL displays, or ONLY to the current display. Language that describes any action you’re applying will appear beside the “Apply” button on any settings page: Apply (all displays) will apply this change to ALL displays, while Apply (this display) will create an override for the current display, taking it “out of sync” with the other displays in the view. To create an override on the current display or apply changes to all displays, click the “For” dropdown menu at the top of a settings page, which will show you the relevant options.
Title
The field allows you to give the view a title, which can be configured to display (in the case, for example, where a view will be an entire page) as the title field on a block or page.
Format
This sets the Format of the view’s output. You can use the query’s resulting data fields to create an unformatted list (most common), a table, a grid, a Leaflet map. Since the RC site has the “Views Bootstrap” module installed, the output format list also includes bootstrap elements (for more on Bootstrap components, see the Bootstrap documentation). To switch the output format, click the format name (e.g., “unformatted list”); to alter the output configuration, click “settings.”
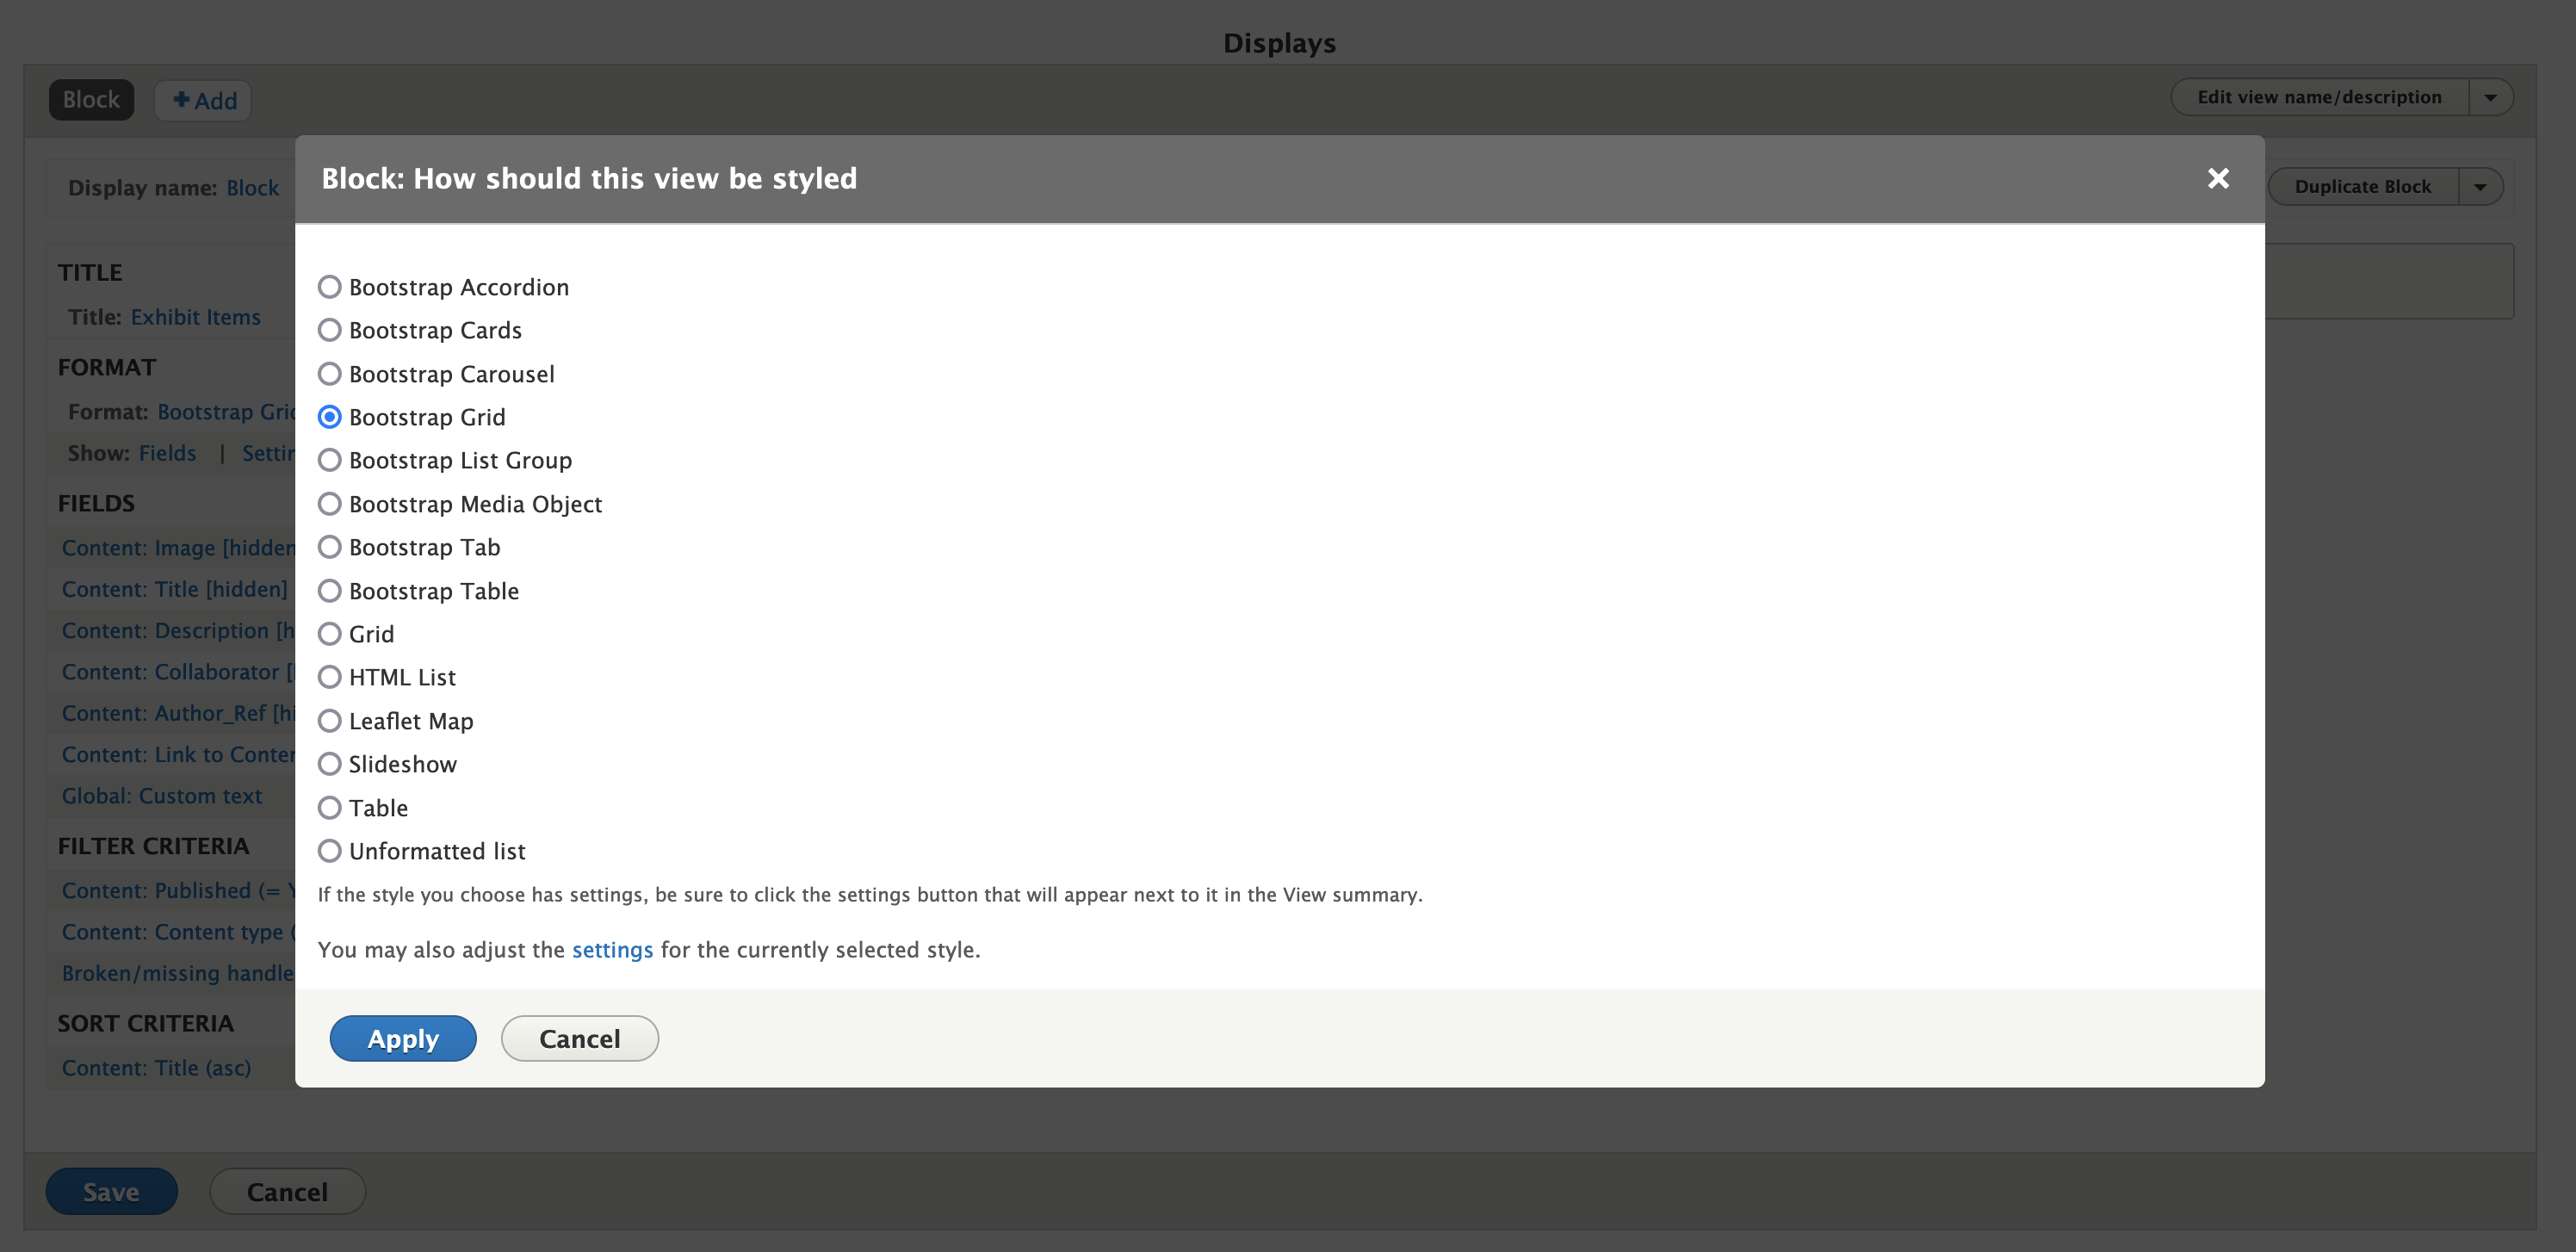
Depending on which output format you choose, you’ll be faced with more options, often to decide how the view will construct rows and/or columns from the result of the view’s query. This gets too complicated to provide a complete walkthrough; just do your best & experiment and you’ll eventually get the output you want. If you’re just creating a view with the “unformatted list” output option, you can proceed without changing any of the defaults; usually you won’t need to change anything for this format.
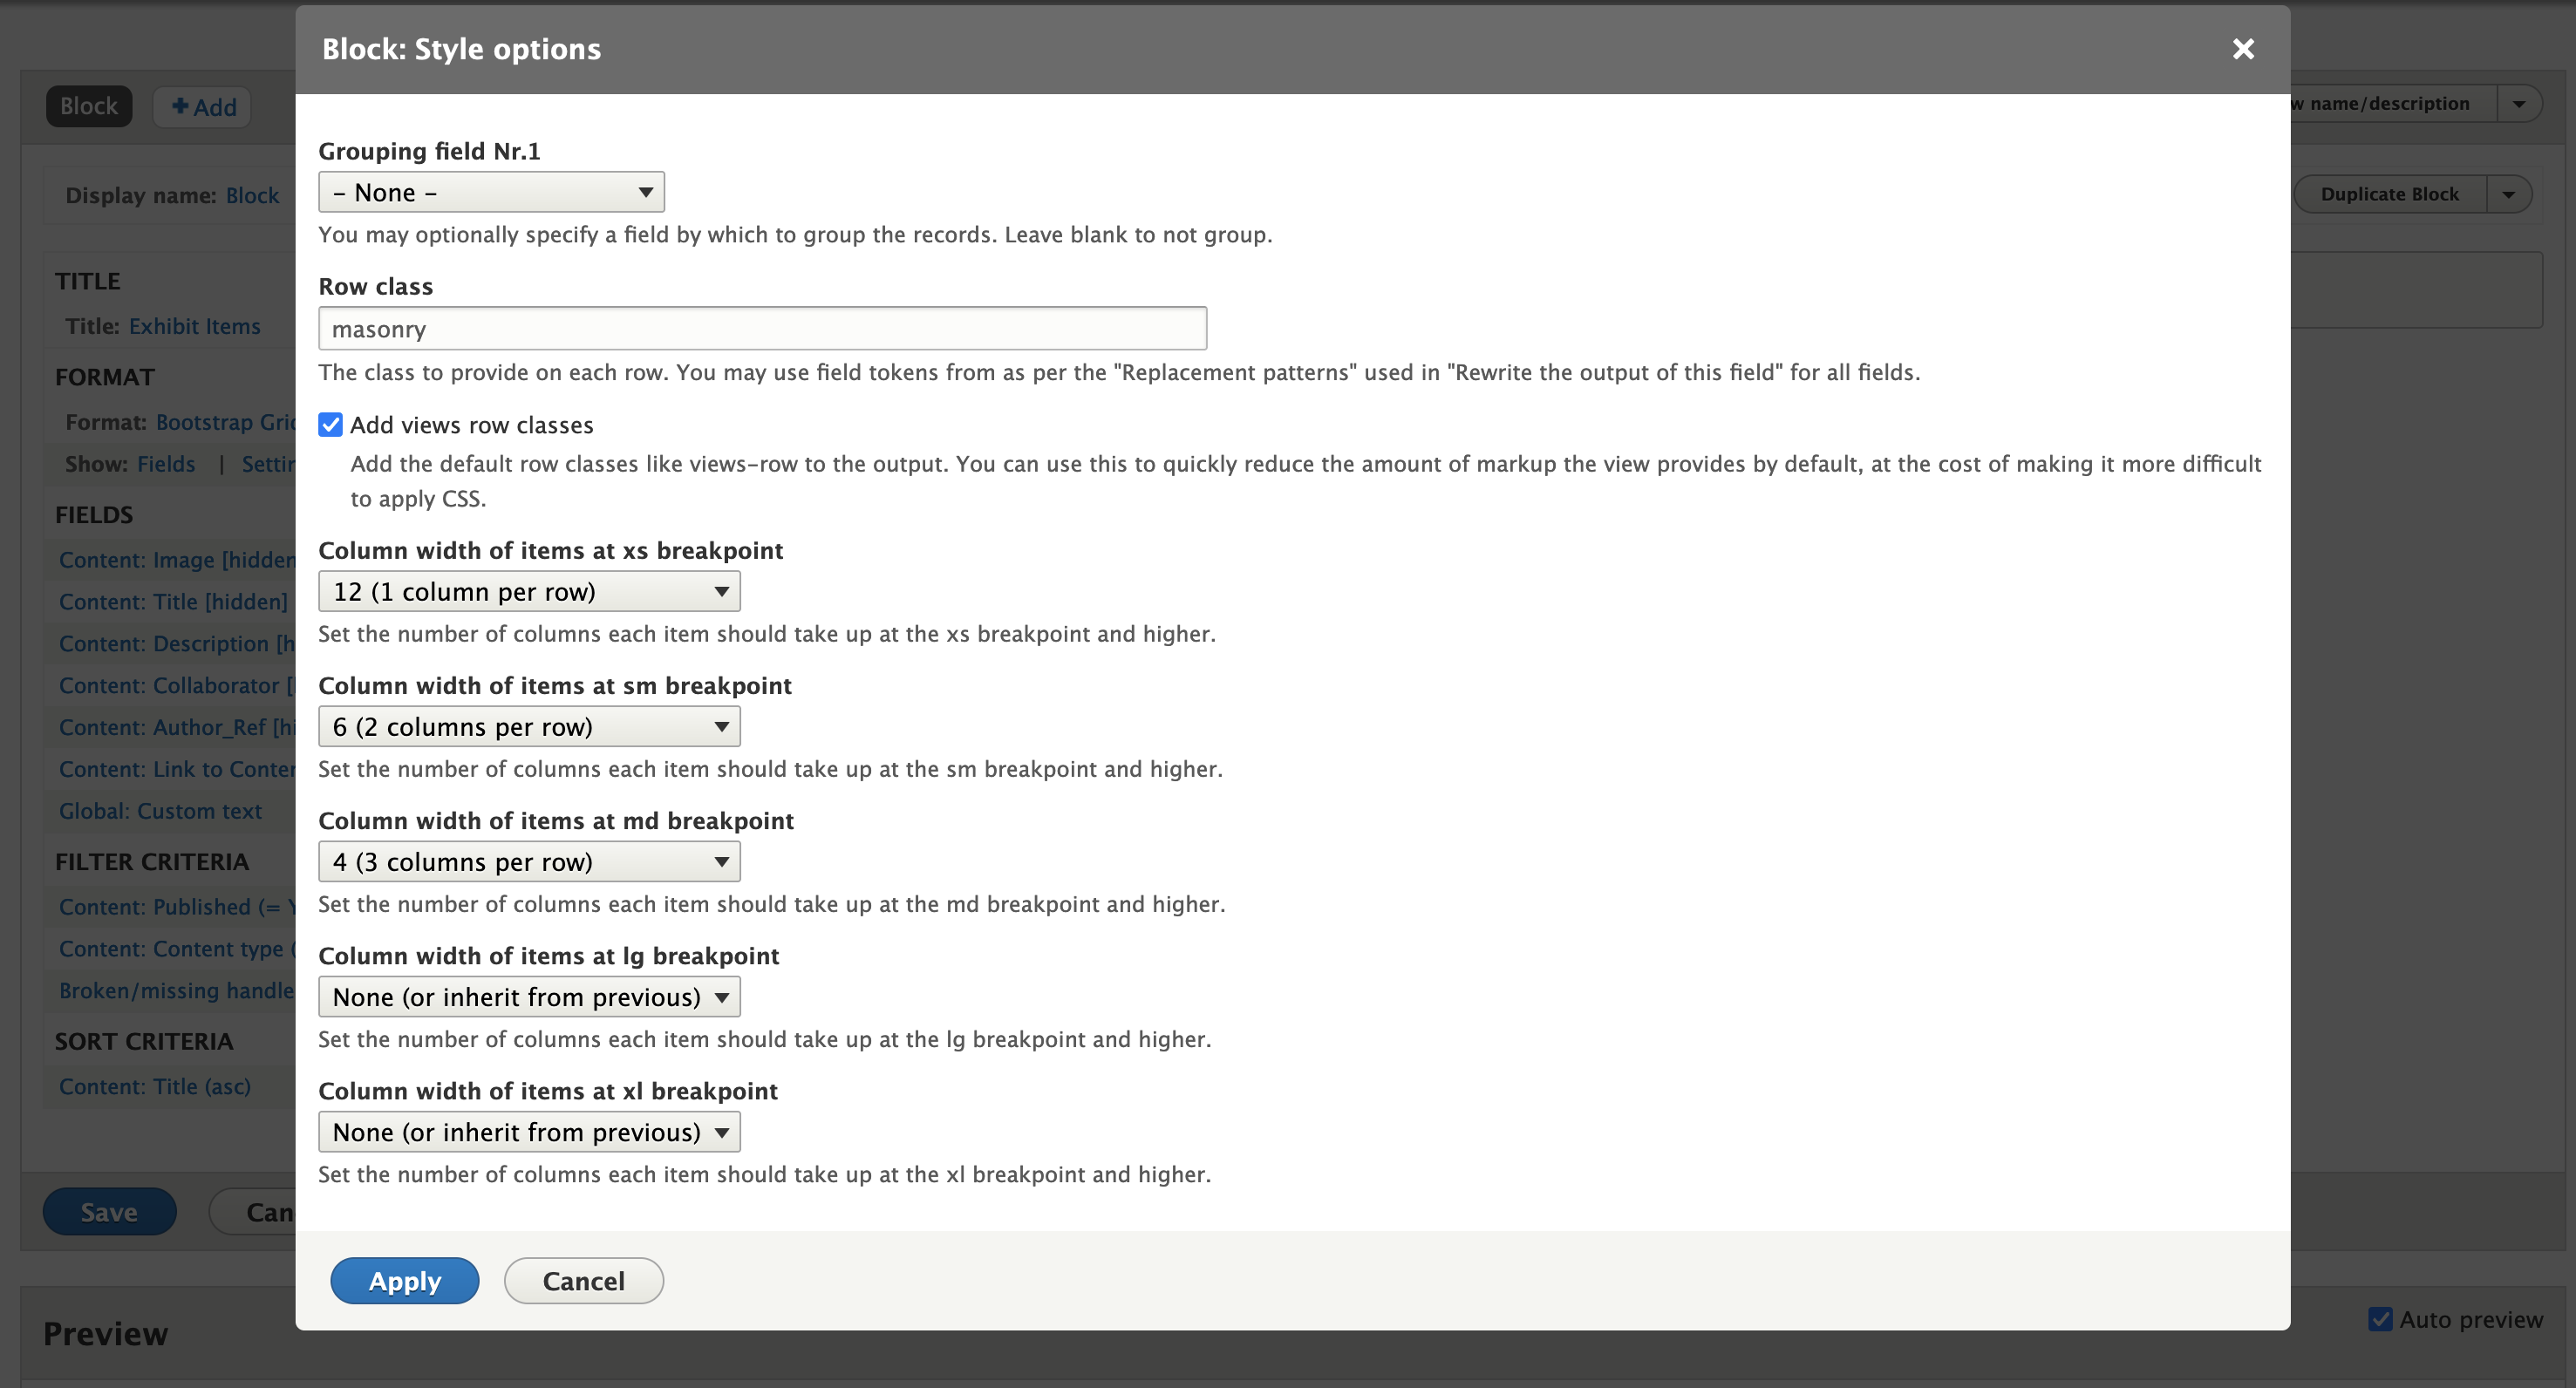
The screenshot above shows settings that populate if you select the “Bootstrap Grid” format for output, which is significantly more involved than the standard “unformatted list” format. Note that for some output formats, a Show variable will appear. Almost always you’ll want to show “fields,” but in rare cases you may want to show an entire content type.
Fields
This section is where you set which fields the view will “pull in” to its display; it can’t “see” anything that isn’t specified in this field section. For this reason, it’s a common technique to configure the field as “exclude from display,” which suppresses the visibility of the field while “holding on” to its data for use (often via “custom text” or the “rewrite results” option).
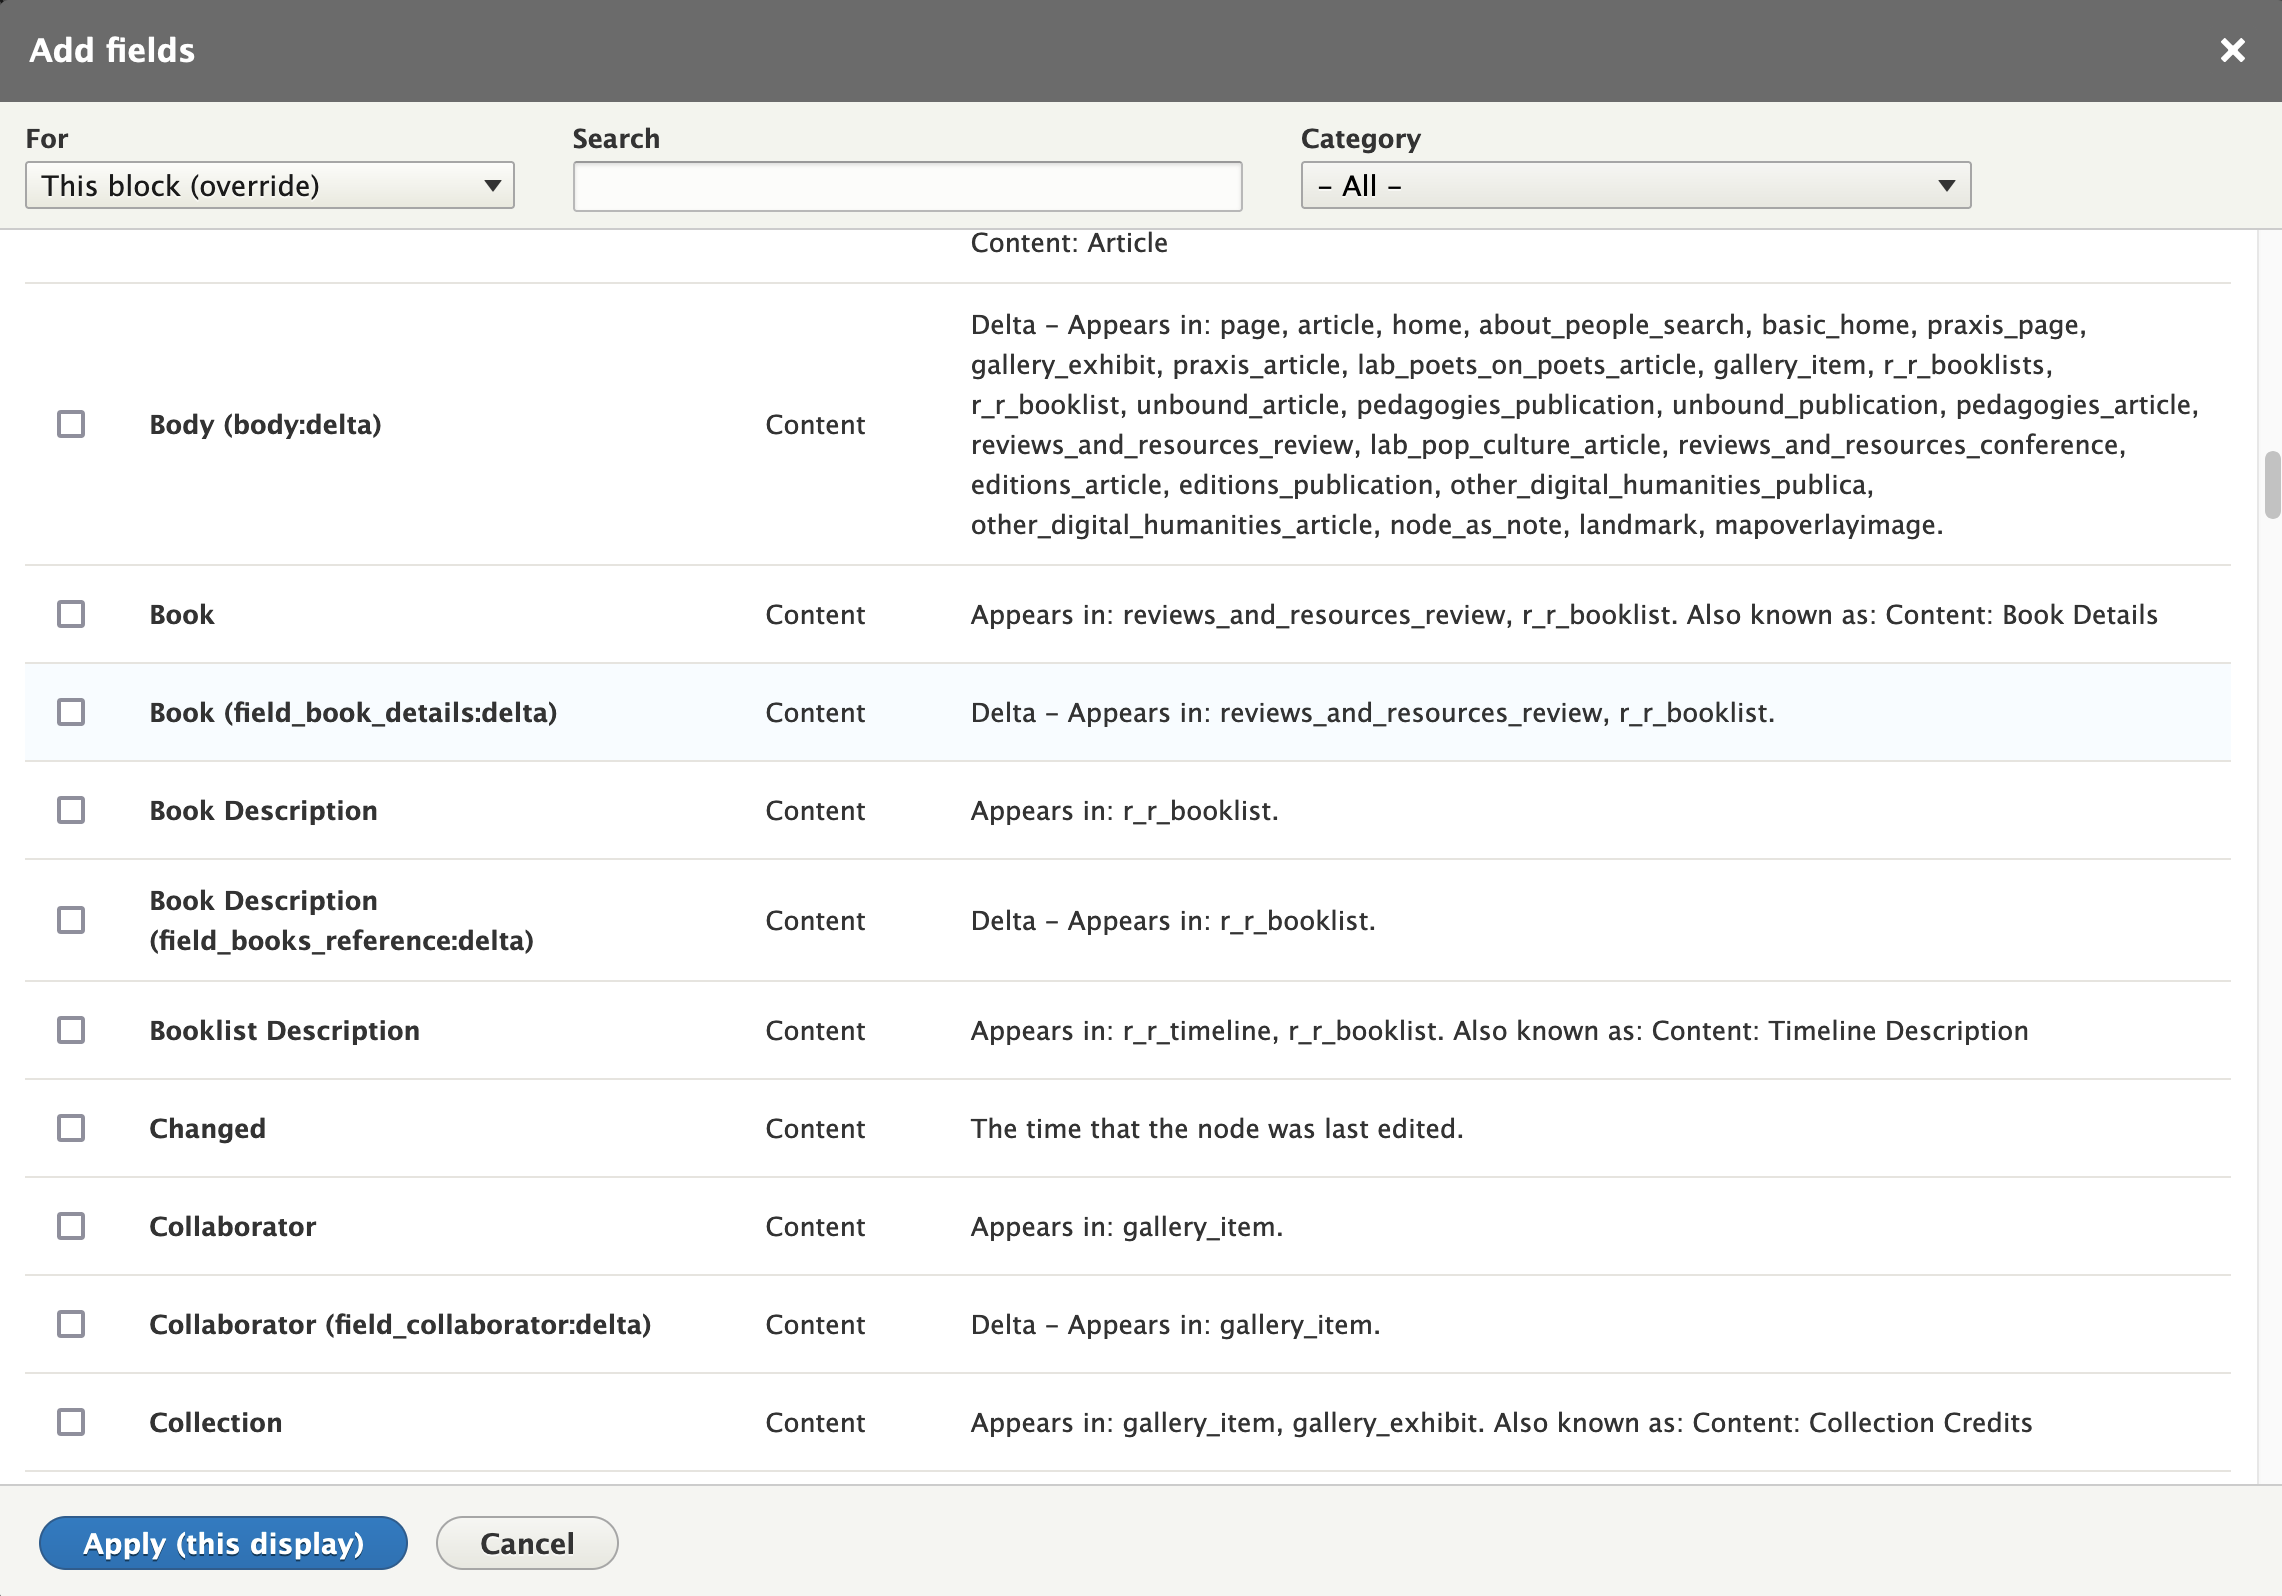
To set a field, click “Add” and then search for the field you’re looking for. (If in doubt about what a field’s actual name is, simply navigate to Structure / Content types / “Manage fields.”) Note that you can specify anything here that is a Drupal field, including everything from essay abstracts, body text, etc., to image fields, author names and bios, taxonomy terms, and so on. You can point to as many fields in this section as you want, though you’ll want to ensure they are a coherent group of fields that can respond in a meaningful way to the filters you’ll set in the following section.
If a field is not “hidden” by the “exclude from display” option, it will display in the view output in the order listed. You can easily rearrange the order that the fields are pulled / displayed in by clicking the down arrow beside “Add” and selecting “Rearrange.”
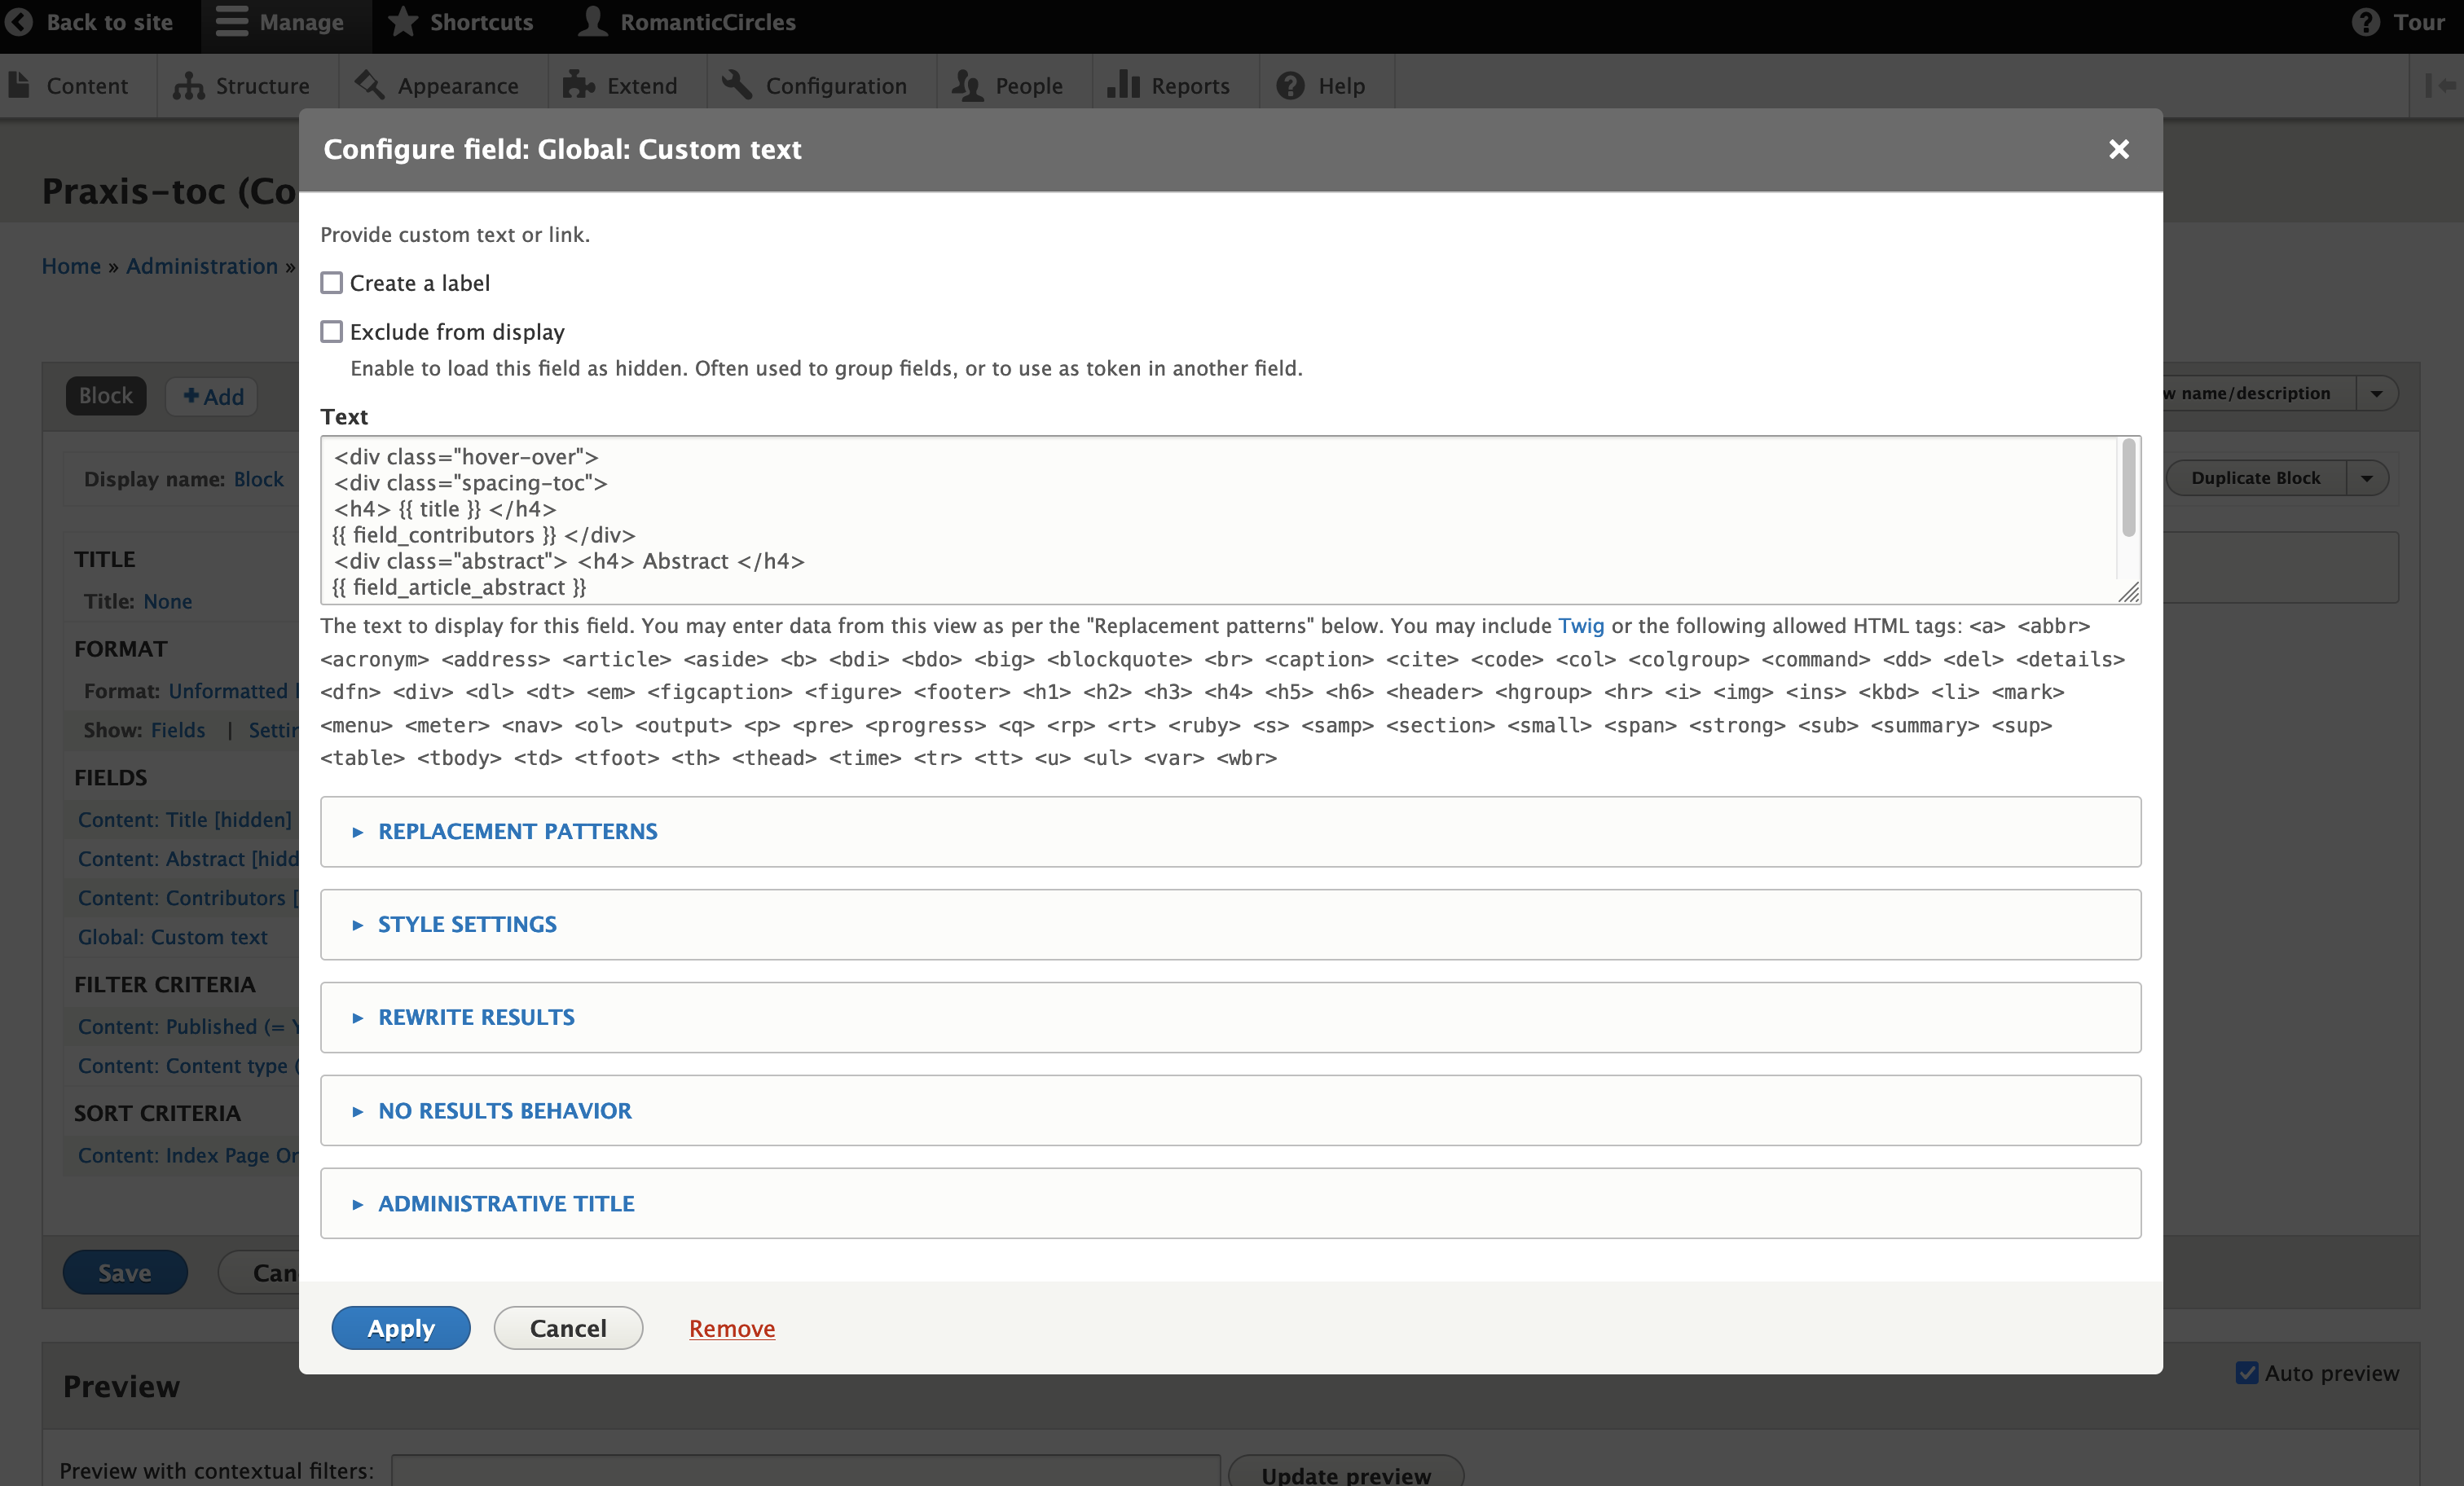
A powerful tool at your disposal in the Fields section is the “Global: Custom Text” field (see screenshot below), which can be configured to display pretty much anything you want using a combination of HTML and Drupal’s PHP-based “replacement patterns.” In short, any field you’ve “pulled into” the view will be given a replacement pattern that can be used in the blank text box the custom text field presents you with (e.g., “). This can allow you to sculpt the resulting block or page with custom HTML, even pulling files/images (from the file system) into the output that aren’t in the logic of the view itself. This functionality is used extensively throughout the site; any time you’re wondering how something is made, it’s a good idea to look for this “custom text” field inside the relevant view.
Filter Criteria
Often you don’t want the view to pull in every field of a given name across the entire site (e.g., you want essay titles, but not all titles). Here’s where you can filter your results.
To set a filter, simply click “Add” and, again, search for how you’d like to filter the field results. Common criteria are “content type,” the status of the “published” field, “has taxonomy terms,” and other descriptive elements that might set your desired content apart from the rest of the content on the site. Some filters will require additional options that must be configured via “Settings,” if this link appears. If you’re feeling lost on how to filter your results, look at some existing views to get a feel for how they’re accomplishing this work.
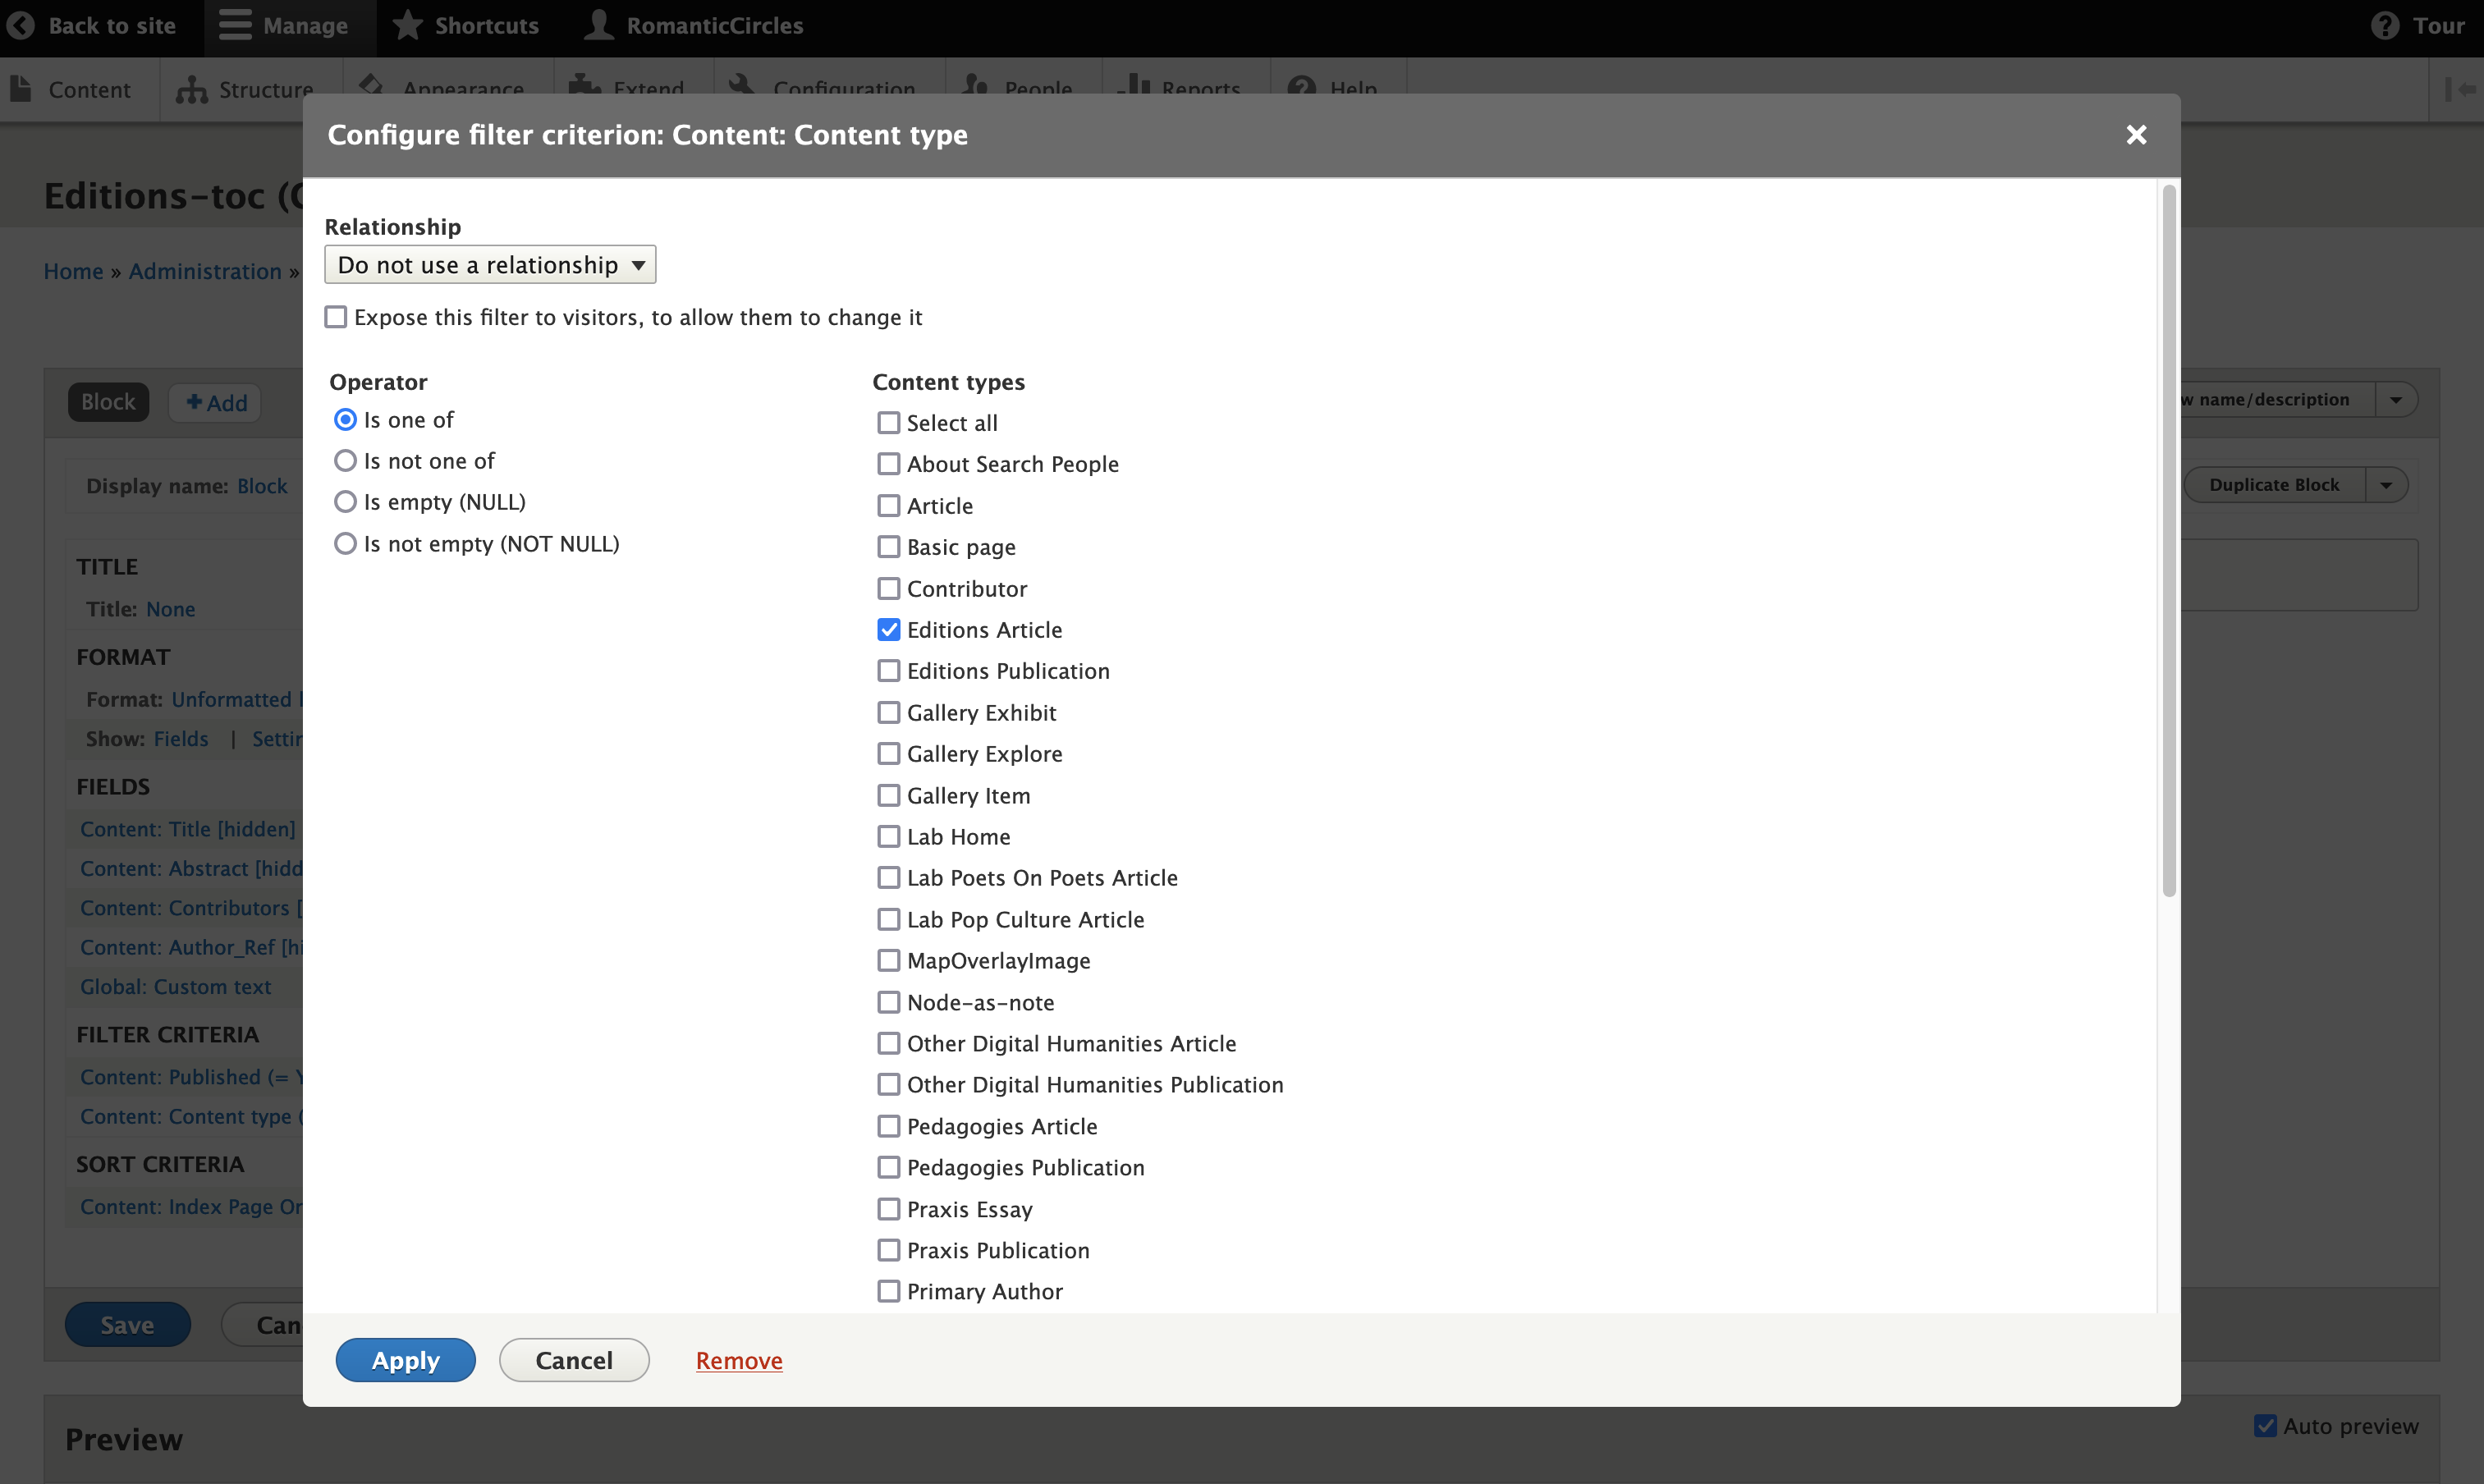
Even more so than with fields, the order of your filter criteria matters; the order of the criteria will determine the order of the filtering, and this order can change the results dramatically. You can rearrange the criteria order by clicking the arrow beside “Add” and selecting “Rearrange.”
Sort Criteria
If no sort criteria are present, the view will present the fields resulting from your query in the order they’re listed in the config. It’s often desirable, however, to impose a sorting order on the results.
To add a sorting criteria, click “Add” and search for your preferred sorting method. Often this will be alphabetical, by publication date (ascending or descending), by the index page order field, or similar.
As before, you can add as many of these criteria as you want, and the order matters.
Block / Page Settings
In the middle column of the views interface, you’ll see either “Block Settings” or “Page Settings,” depending on which display output you’ve selected. Most of these settings are identical and self-explanatory, but brief descriptions of important options follow.
Block: includes the options “Block name” (doesn’t matter), “Block category” (should usually be “Lists (Views)”), and “Access” (if set, usually to “View Published Content”). Page: includes the options “Path” (allows you to set, via relative link [e.g., /editions/page], the resulting page’s URL alias), “Menu” (don’t set), and “Access” (same as above).
Either display’s setting allows to configure the following four options:
- Header: add a configurable header to the main view’s content, often via “Global: Text area”
- Footer: add a configurable footer to the main view’s content, often via “Global: Text area”
- No Results Behavior: tells the view what to do if its query doesn’t produce any results. This can be useful when you’ve created a view whose filters are “exposed” to visitors; like the header and footer, this behavior can be configured via text field / HTML.
- Pager: determines how much of the page or block the view covers (“full” vs “mini”), and how many items will fit on a single page. If the view overflows a single page, Drupal will automatically provide “Next” buttons to advance to the view’s next page.
Advanced
As advertised, things get a bit more complicated in this section. If you’re not after anything too complicated, you might not need to change any of the “Advanced” settings. But sooner or later, you’re likely to run up against a view that leverages these powerful tools.
Here’s a brief overview of each of these advanced options, with external resources.
- Relationships: this function only works on fields which are tied to another entity via Drupal’s entity reference system. Via configuring a relationship, you can pull in data that is tied to the content type / fields specified by the view but is of a different content type.
- For example, RC has different content types for Index Pages (volume parent resources) and essays. To auto-generate a TOC on each Index Page, we set up a relationship based on the “field_ref_parent” content, which sets the common parent volume for all essays that belong together.
- See this documentation for a walkthrough of a simplified views relationship use case.
- Contextual Filters: this function provides an advanced filter based on the URL or other attributes of the content in question; you can use the filter to include or, vitally, to exclude certain content from a view. In the gallery, for example, we might not want all thumbnails of images to display in all cases, and can filter out the image being presented on the main page from also being presented as a fingernail image on a side panel (block).
- This is a very complicated feature that we don’t use much, though you may encounter it on the site. For a simple use case, see this documentation.
- Exposed Form: this function does what it says; it exposes the view query’s sorting mechanism to be edited by site users. Note that this option does not generate an exposed filter for visitors to use: it merely creates an additional block output called “Exposed form: [view-name]” that can be called in a page layout via Layout Builder.
- Use AJAX: AJAX (Asynchronous JavaScript And XML) allows web pages to update “behind the scenes,” without requiring an HTTP(S) reload of the page. Currently the RC site has no views using AJAX in production, but a use case for using it would be serving a view inside a Colorbox pop-up (using NG_lightbox); such a view would probably need to have this box checked. Before you take on such a project, however, be aware that there’s not much documentation out there on making this functionality work in Drupal 9+.
- Use aggregation: if enabled, this function enables a “Aggregation settings” link for each field and filter enabled in the view. These new settings allow you to tap into MySQL’s aggregate functions, including GROUP, SUM, MIN, MAX, AVG, and so on. Not being a particularly stats-heavy site, any use of db aggregation on the RC is likely to be used to group result fields based on a unique characteristic (entity ID or similar) in order to remove redundant results (often a “large” view will pull a field multiple times, and this ensures each field only appears once in the resulting output). A good example of aggregation use on the RC site is the “Gallery-explore-all-images” view. (Unfortunately, going much deeper requires a deep understanding of MySQL logics, which is a pretty deep dive.)
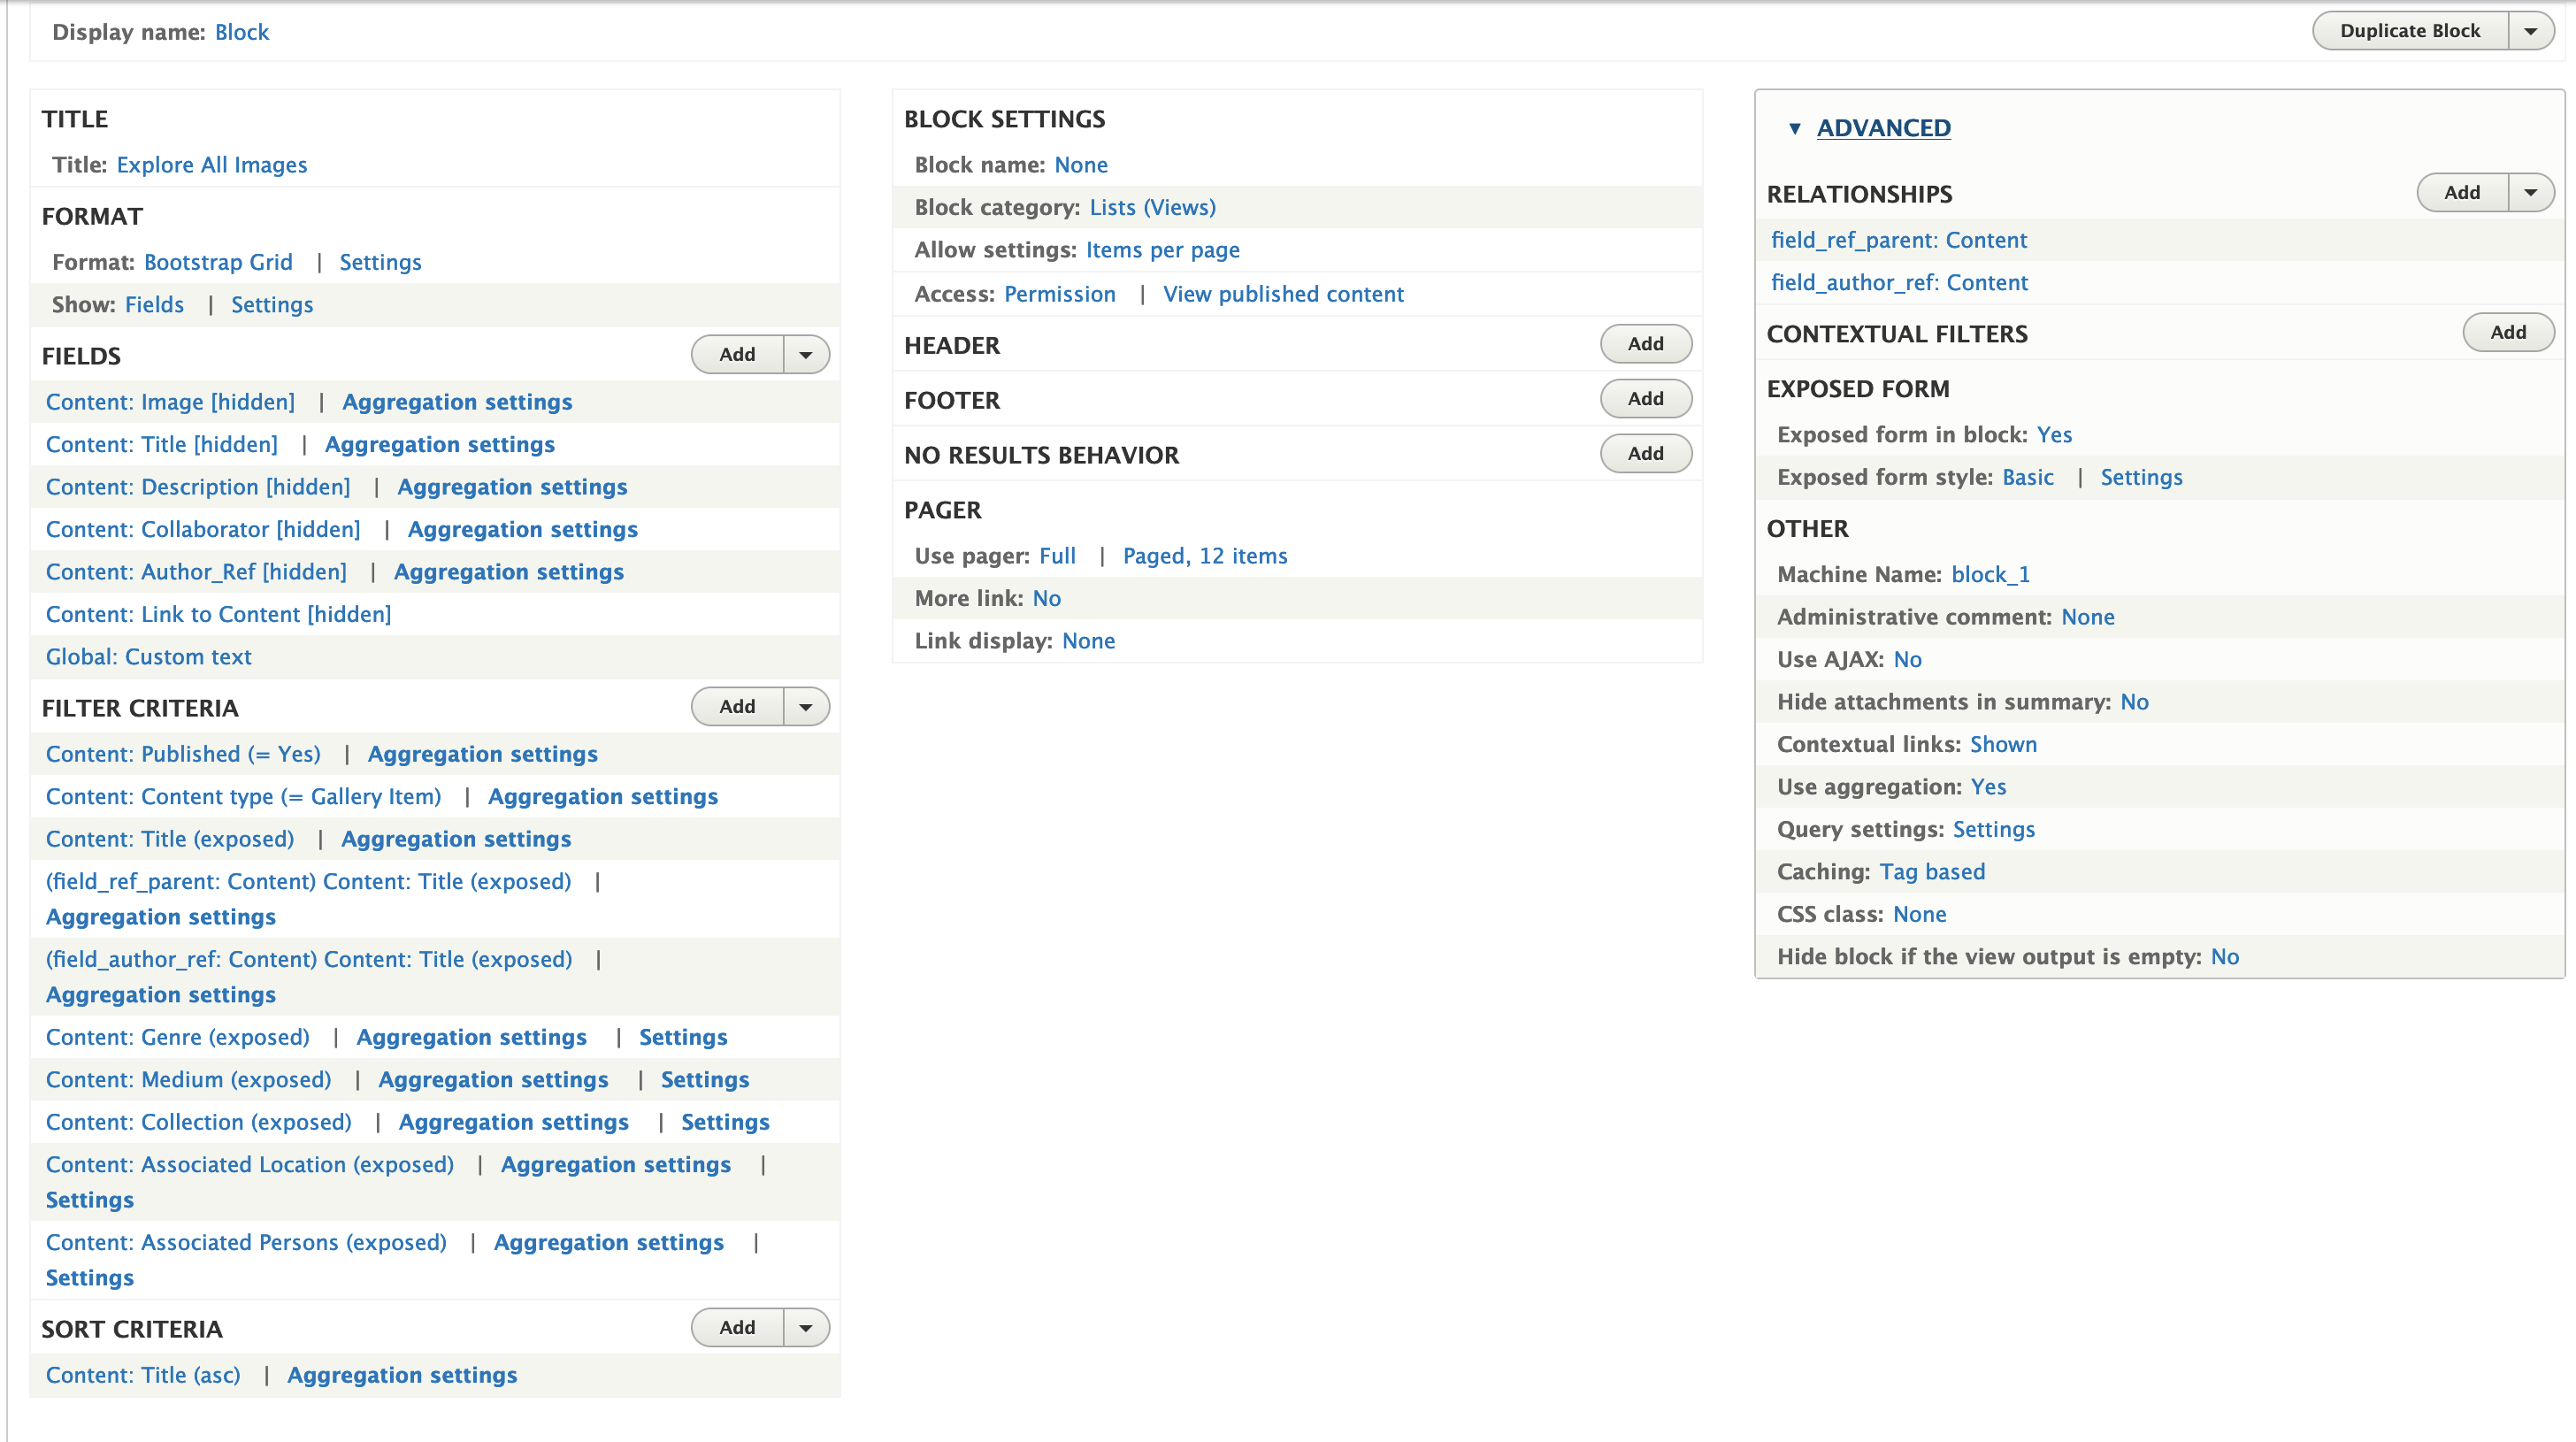
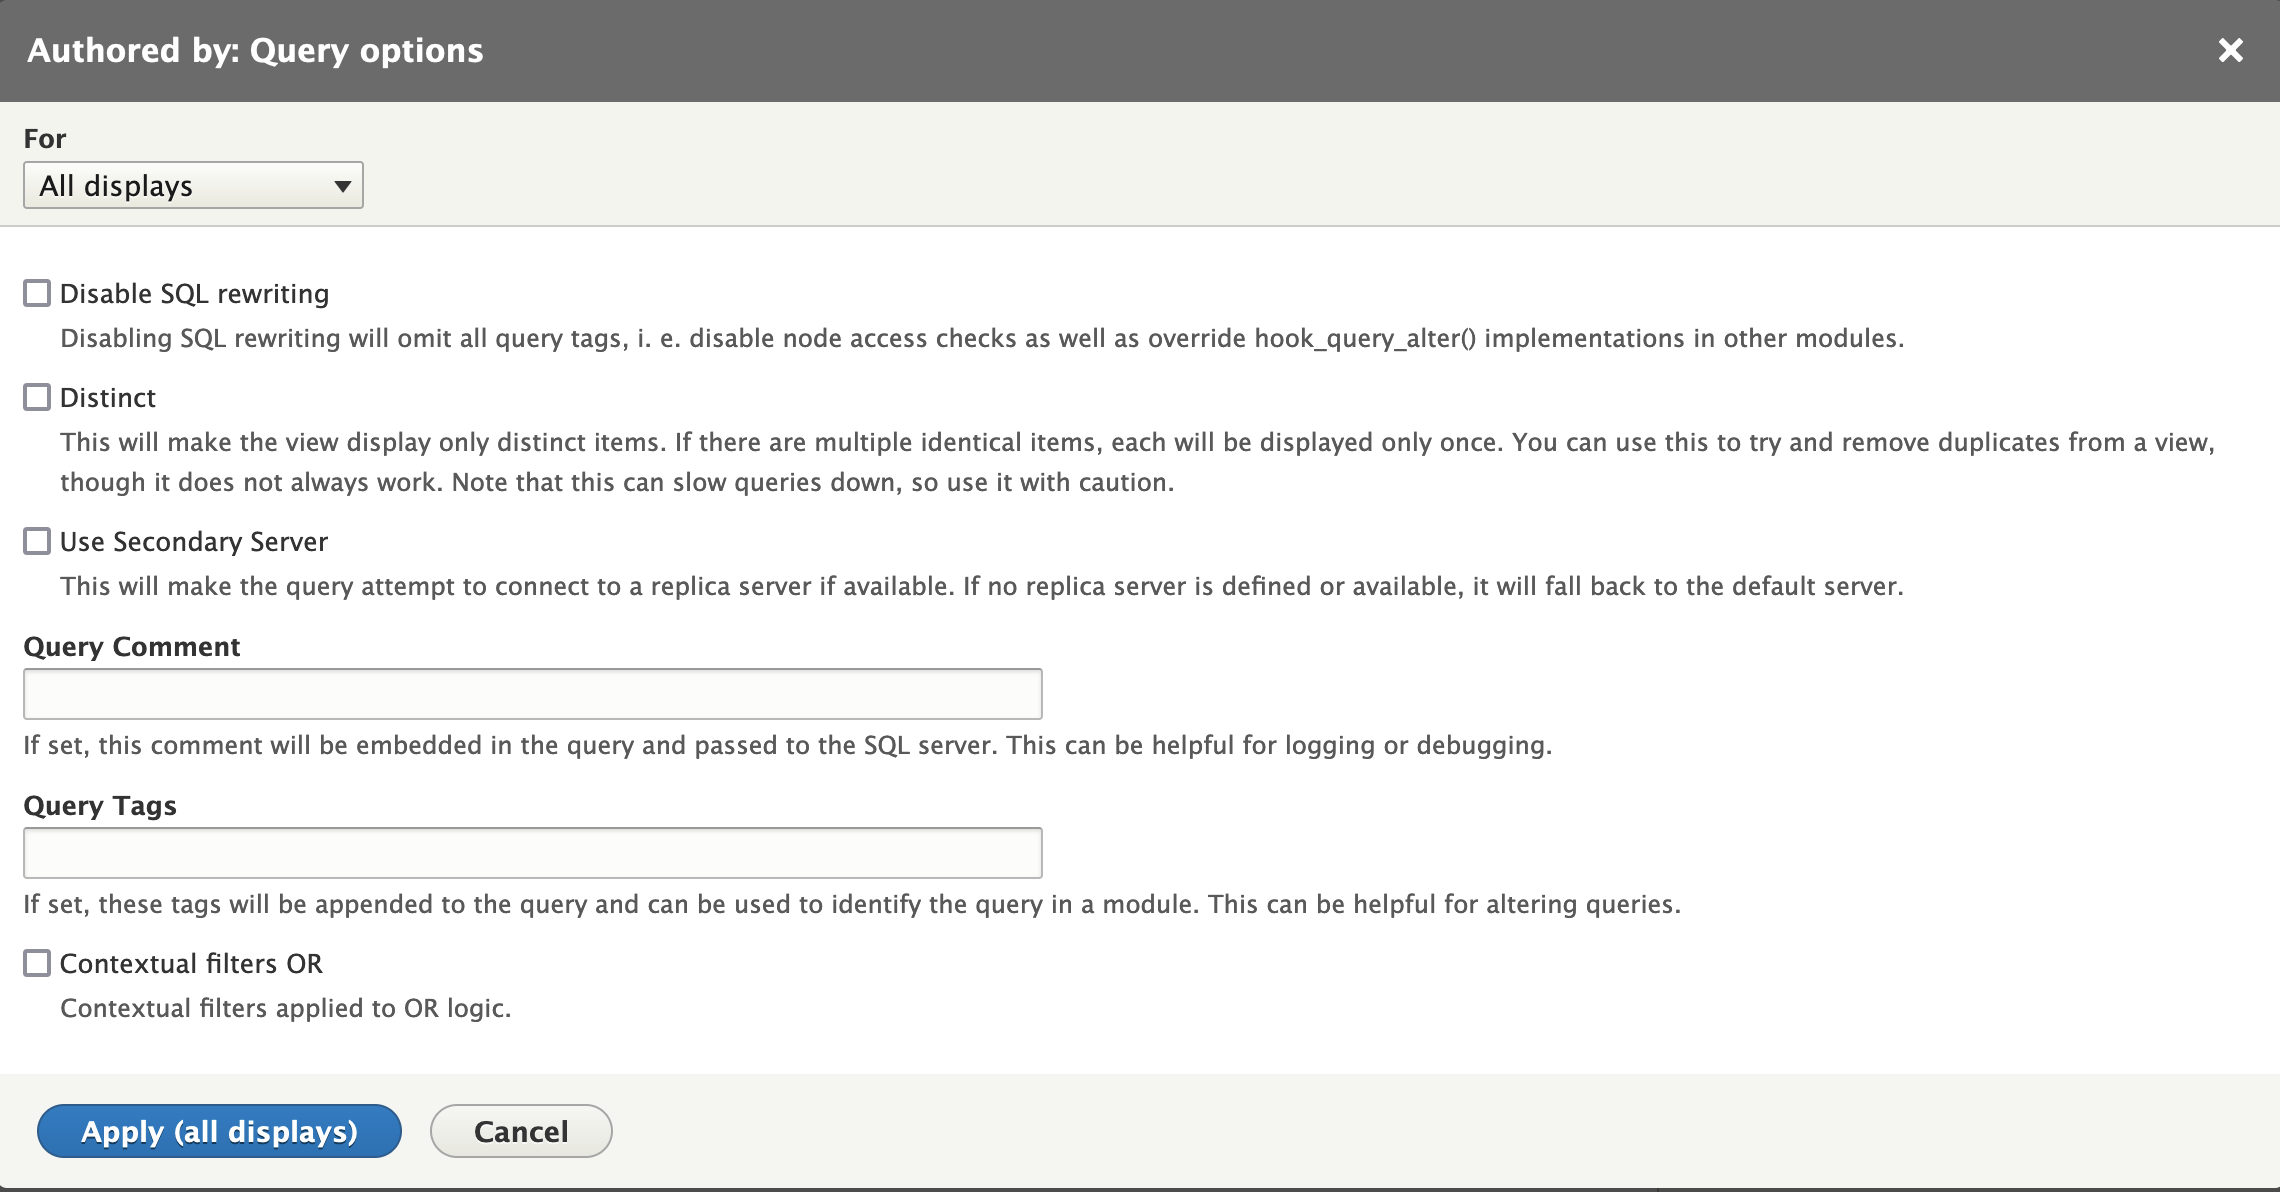
- Query settings: this advanced feature gives you access to finer-grained controls for the query itself. If you run into the duplication problem described in “aggregation,” the “Distinct” option in these settings is an easy first try for a fix. The “Contextual filters OR” option is enabled by a module and enables the “OR” logic operator when dealing with contextual filters. Probably you’ll never need to use anything else on this page.
- CSS class: specify a CSS class to apply to the entire view output. Note that the RC site manages all CSS classes through the Asset Injector module, so you shouldn’t need to use this function.
Using Views
For all their complexity, actually using views on the site is fairly simple:
- Page: A view created as a “page” display can simply be linked to, as is the case for several admin pages generated via views as well as the standalone “Romanticism & Pop Culture” genre pages.
- Block: A view that outputs as a “block” display, on the other hand, can be added as a block to any new or existing page on the site using the Layout Builder. (For more info on the Layout Builder, see the preceding documentation.)