Media and Mapping
The RC Drupal site can handle media assets in several distinct ways, including a dedicated module ecosystem for mapping. This page provides a brief overview of media storage and use as well as documentation on how the site’s Colorbox and mapping functions work.
Images and video content
The RC site serves images to users in two distinct ways:
- From the filesystem: the most common way images appear on the site. Links are created inside an individual piece of content to a path in the file system associated with that content (e.g.,
../editions/guide_lakes/images/x.jpg). The image file (here, “x.jpg”) is manually uploaded to the SFTP (see documentation), and the HTML link created within the content “finds” it and places it on the page. - From a database field (link): any image that is uploaded through the Drupal UI ends up being a field in the database. Drupal stores the associated image somewhere in the file system (by default it places them at the root of the site’s public path, though the upload directory can be specified when creating the image field [
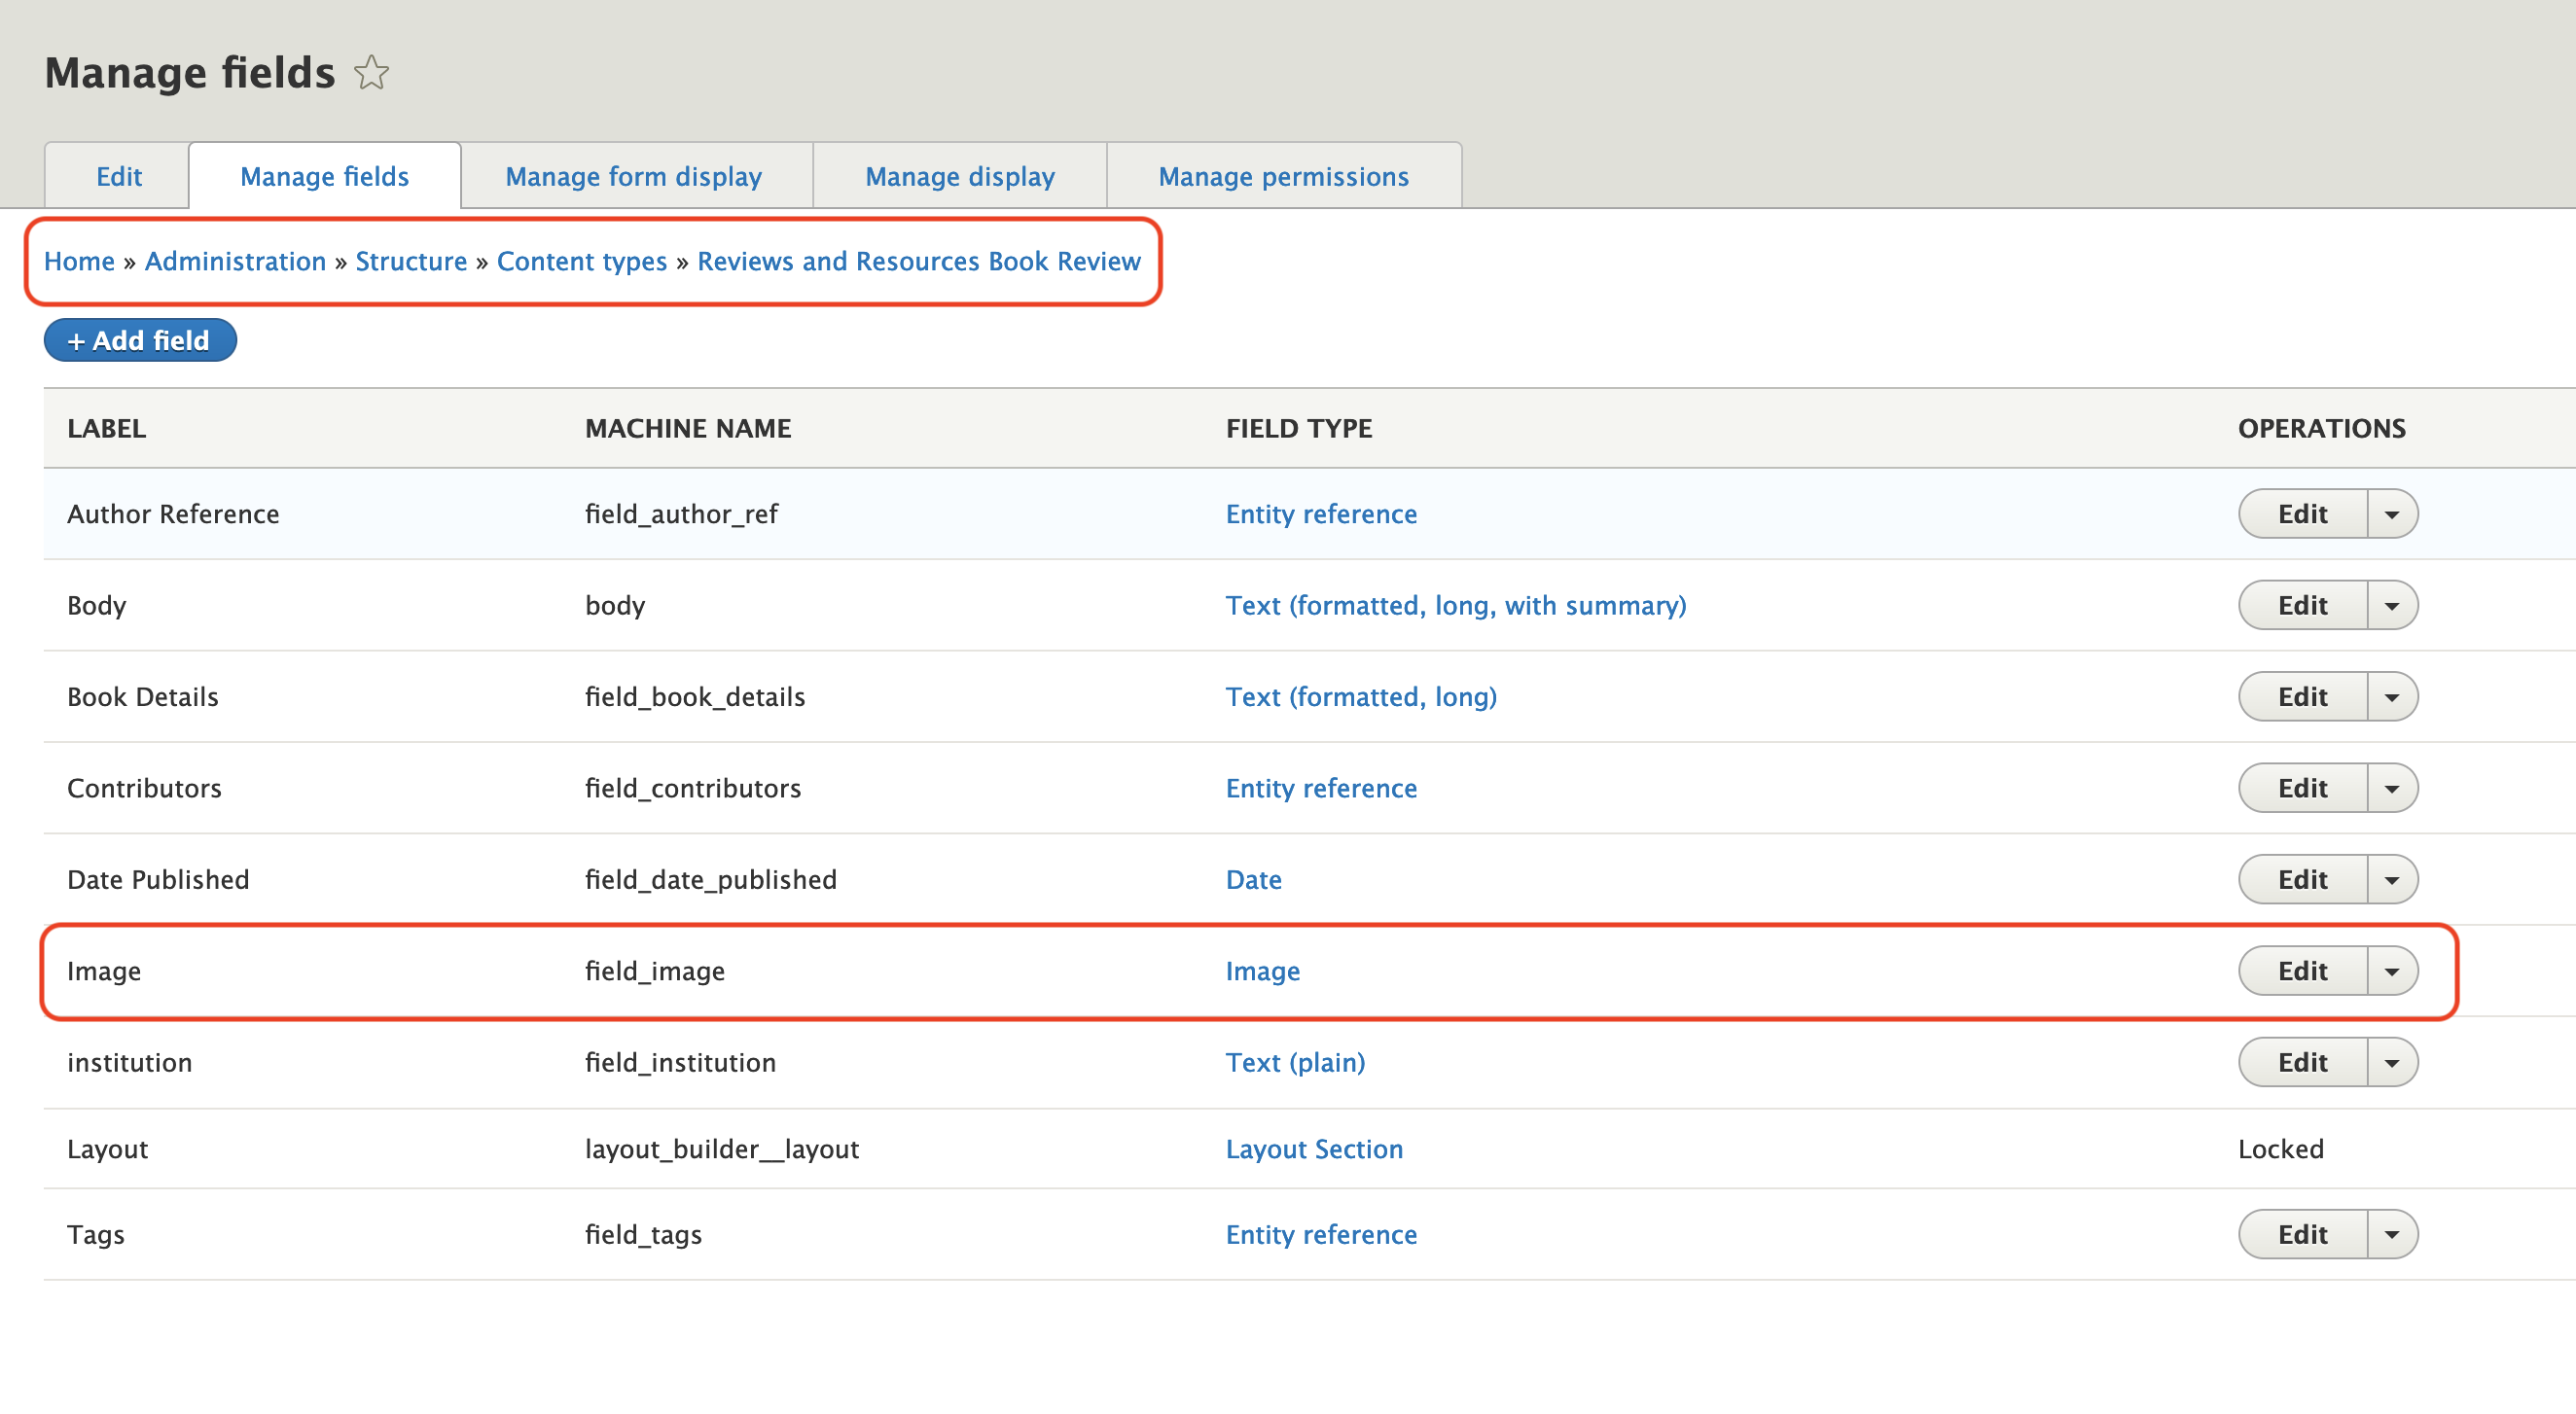
Structure / Content Types / [Type] / Manage Fields]). These images, like all entities in Drupal, are associated with a content type; when creating or editing a content type, a field can be created to enable the uploading of an image (or file). See screenshot below for an example of an image field on a content type.
Note: This is an area for future attention among site developers: the question of whether (and how) to make the site’s under-the-hood handling of images more consistent and efficient.
Image styles
Drupal’s admin “Configuration” menu dedicates a whole section to media settings. Despite appearances, there’s not much here that can be configured except “Image Styles” and the various elements of the Colorbox ecosystem (see below).
The Image styles menu can be used to configure default behaviors and sizes for images that can be applied consistently across parallel content across the site. A quick demonstration of a use case for image styles on the site follows; if you haven’t yet read the preceding Drupal Views documentation, you should do so before proceeding here.
Since certain content types on RC use images in standardized, repetitive ways, it is possible to create clearly defined image styles to standardize resolution, dimensions, and other attributes for images that will be uploaded as fields via the Drupal UI. This is the case with book reviews in the “Reviews & Resources” section of the site: every book review appears with an image of the cover art for the featured book. Thus we create an image field on the “Reviews and Resources Book Review” content type to allow an image to be uploaded with each review. So far, so easy.
But we don’t set an “image style” on that field; indeed, it is not possible to do so. Instead, we create an image style from the admin Configuration / Media menu, discussed above:

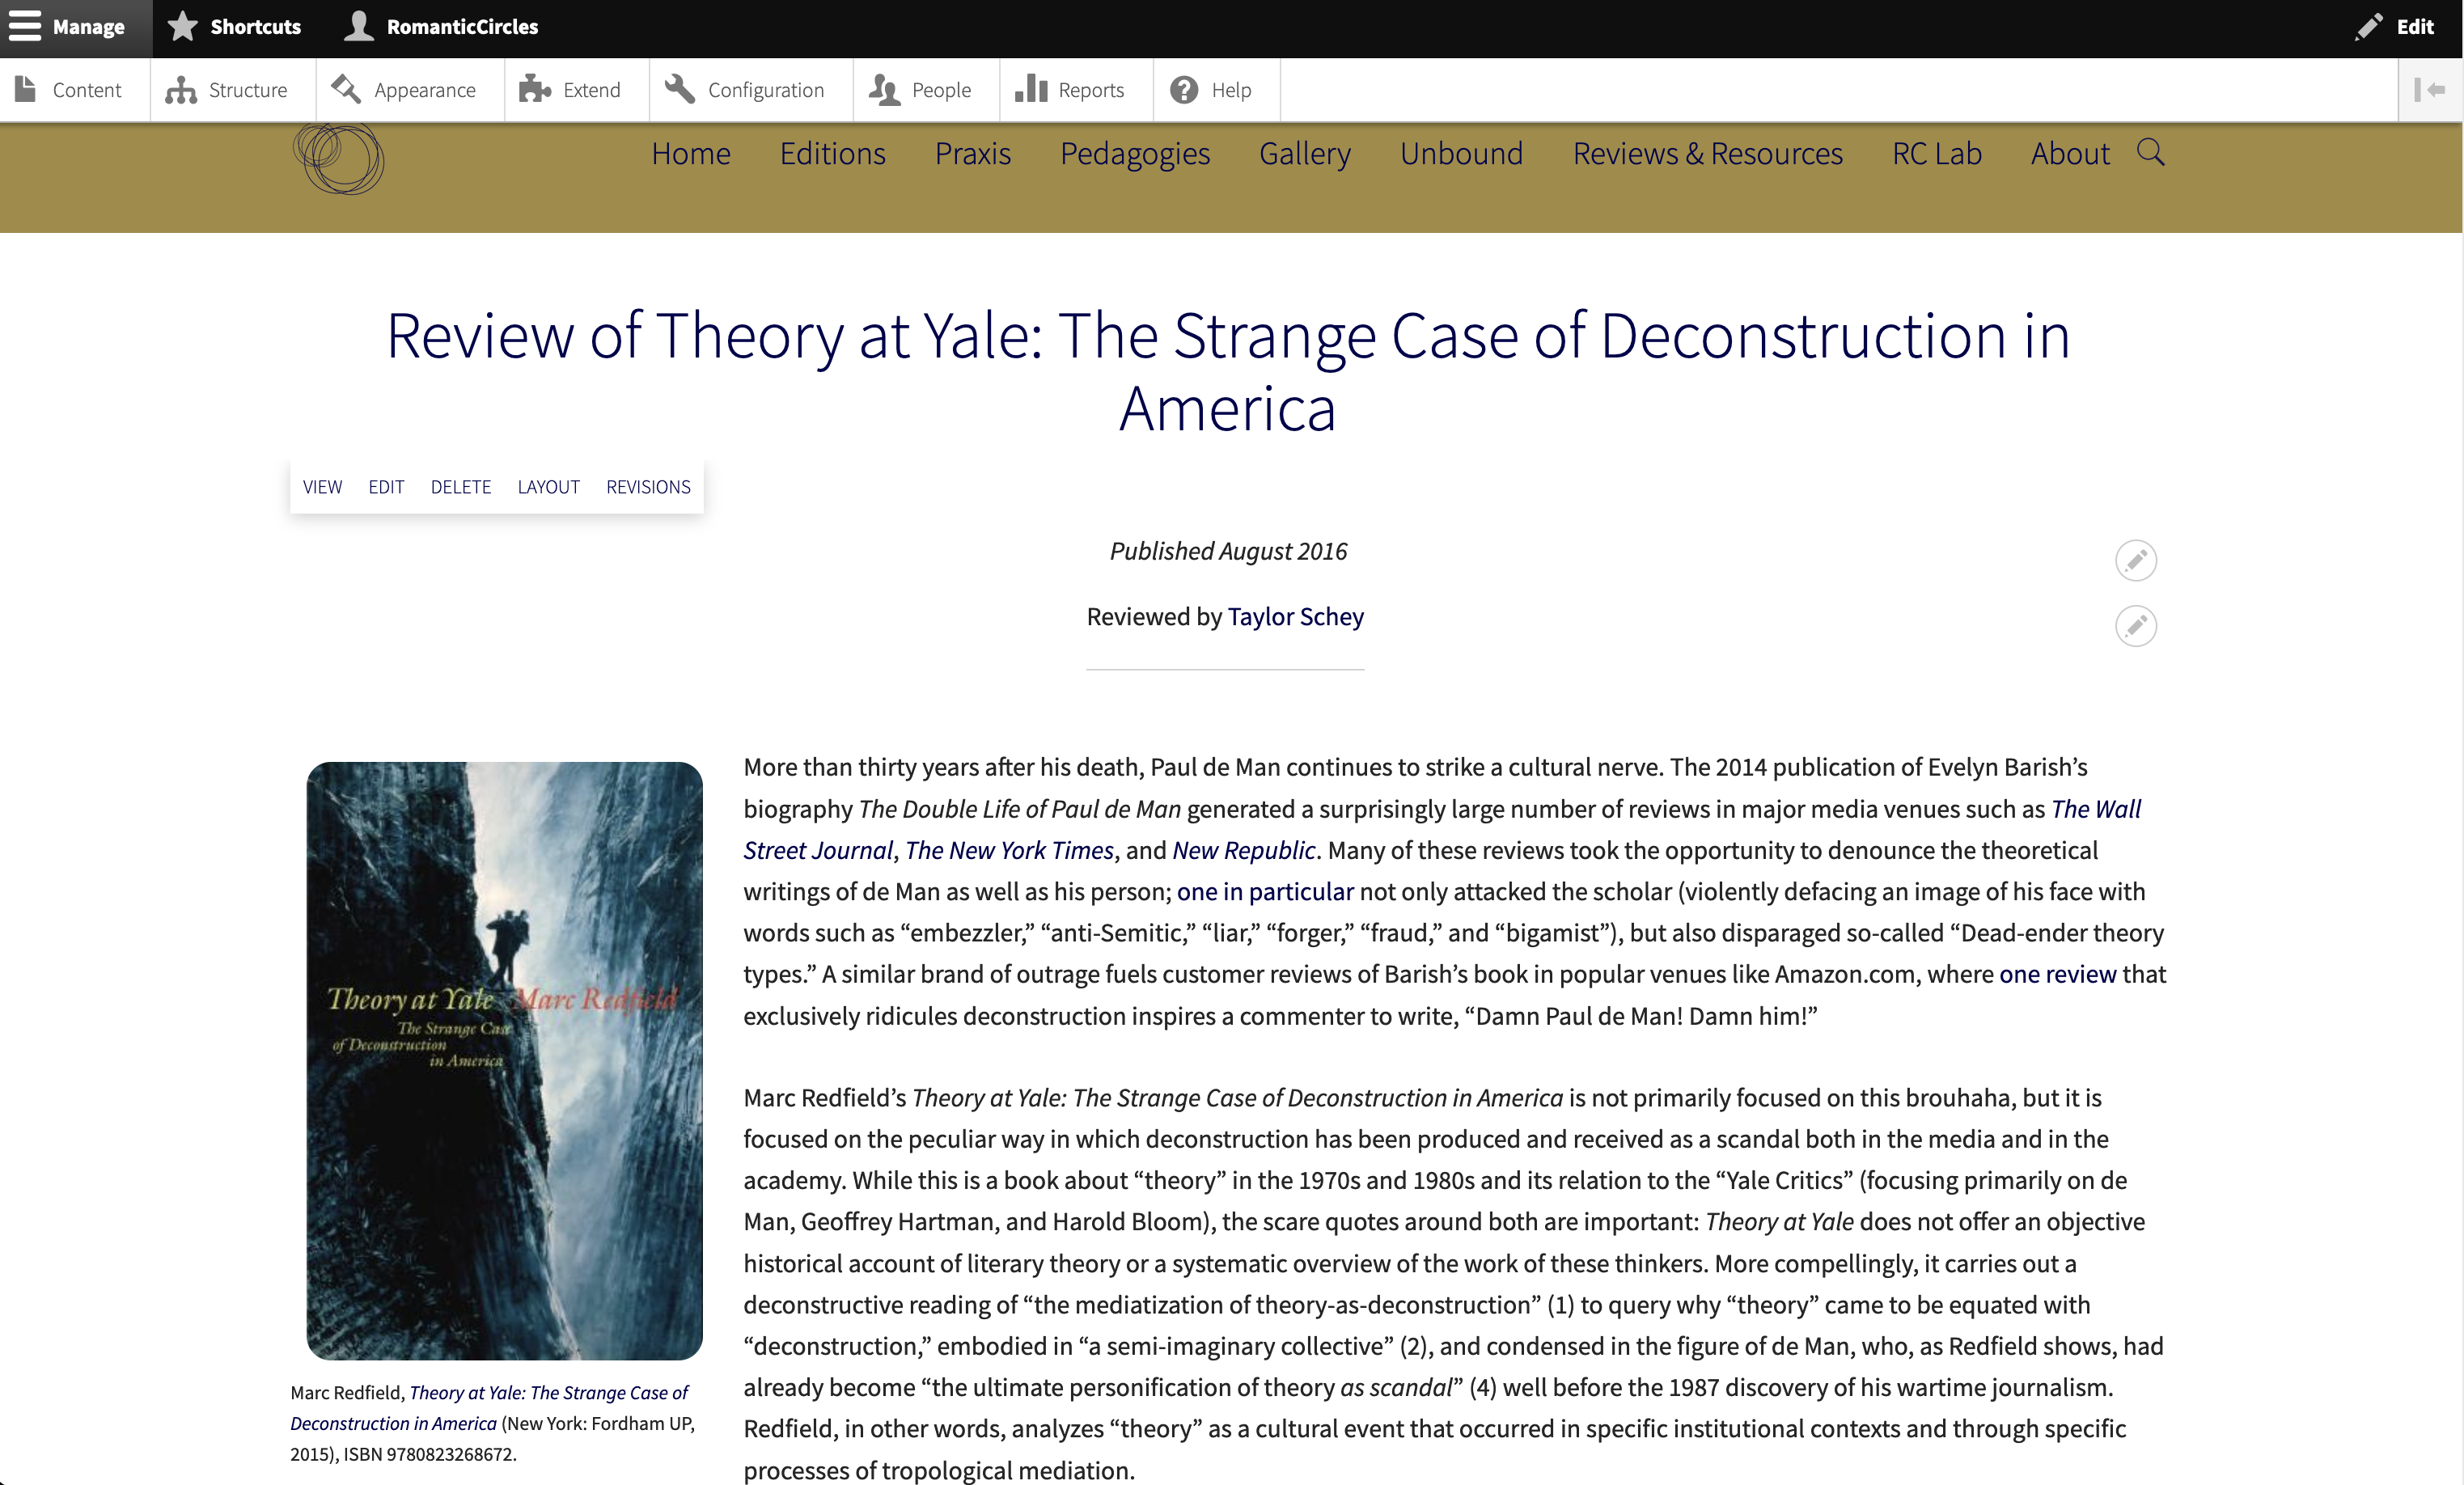
Next, we set a layout template for the “Reviews and Resources Book Review” content type in Drupal’s Layout Builder, which allows us to insert different view blocks and fields that create several adaptive elements onto the page, such as title, date published, author name, the book image, the body of the review, and so on. The first image below is the resulting page, and the second is the Layout Builder that creates it:
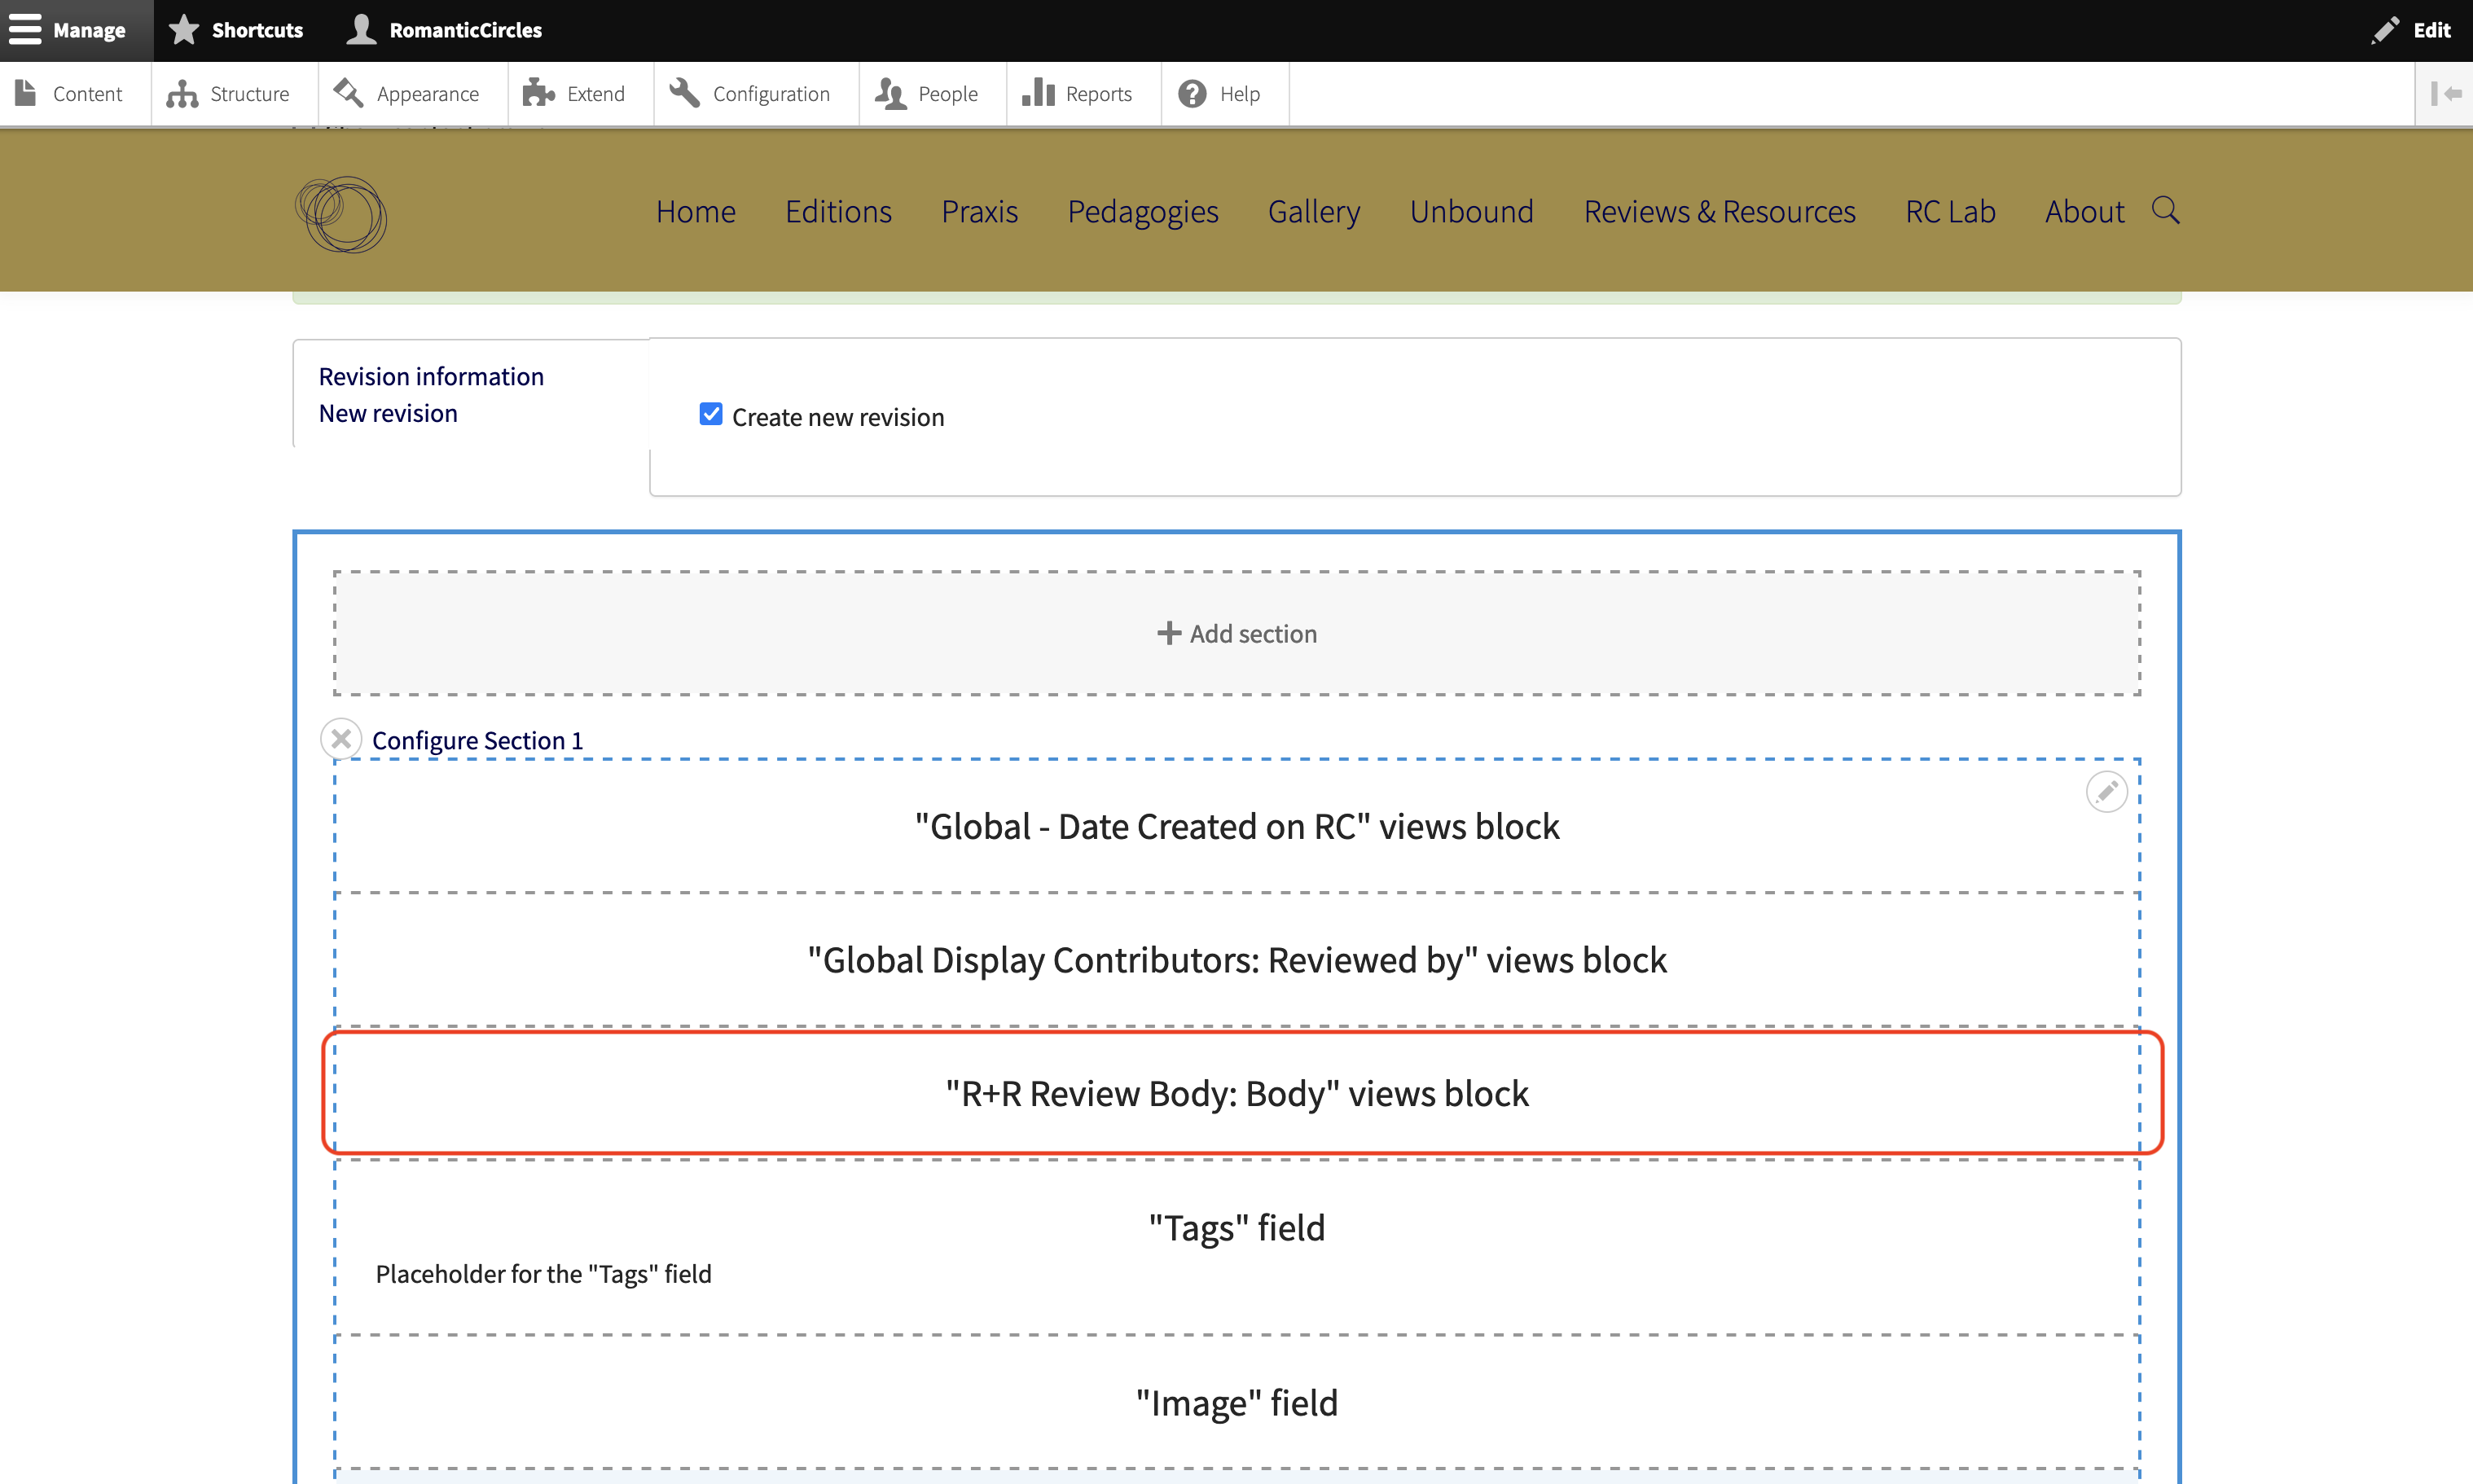
We see in the Layout Builder that a Drupal view block called “R+R Review Body” is generating the page’s main content. Unfortunately, all we can do from the Layout Builder is “configure” the block, which will allow us to set a CSS class on the block via the Layout Builder Styles module, but does not allow us to edit the underlying view. We’ll need to navigate to Structure / Views / R+R Review Body to see what’s going on.
As expected, we’ll see that the “Content: Image” field is pulled in for the “Reviews and Resources Book Review” content type (the former being “pulled” as a field, the latter being applied as a filter). If we click on the “Content: Image” field (which, note, is set to “hidden”), we’ll see the following config options:
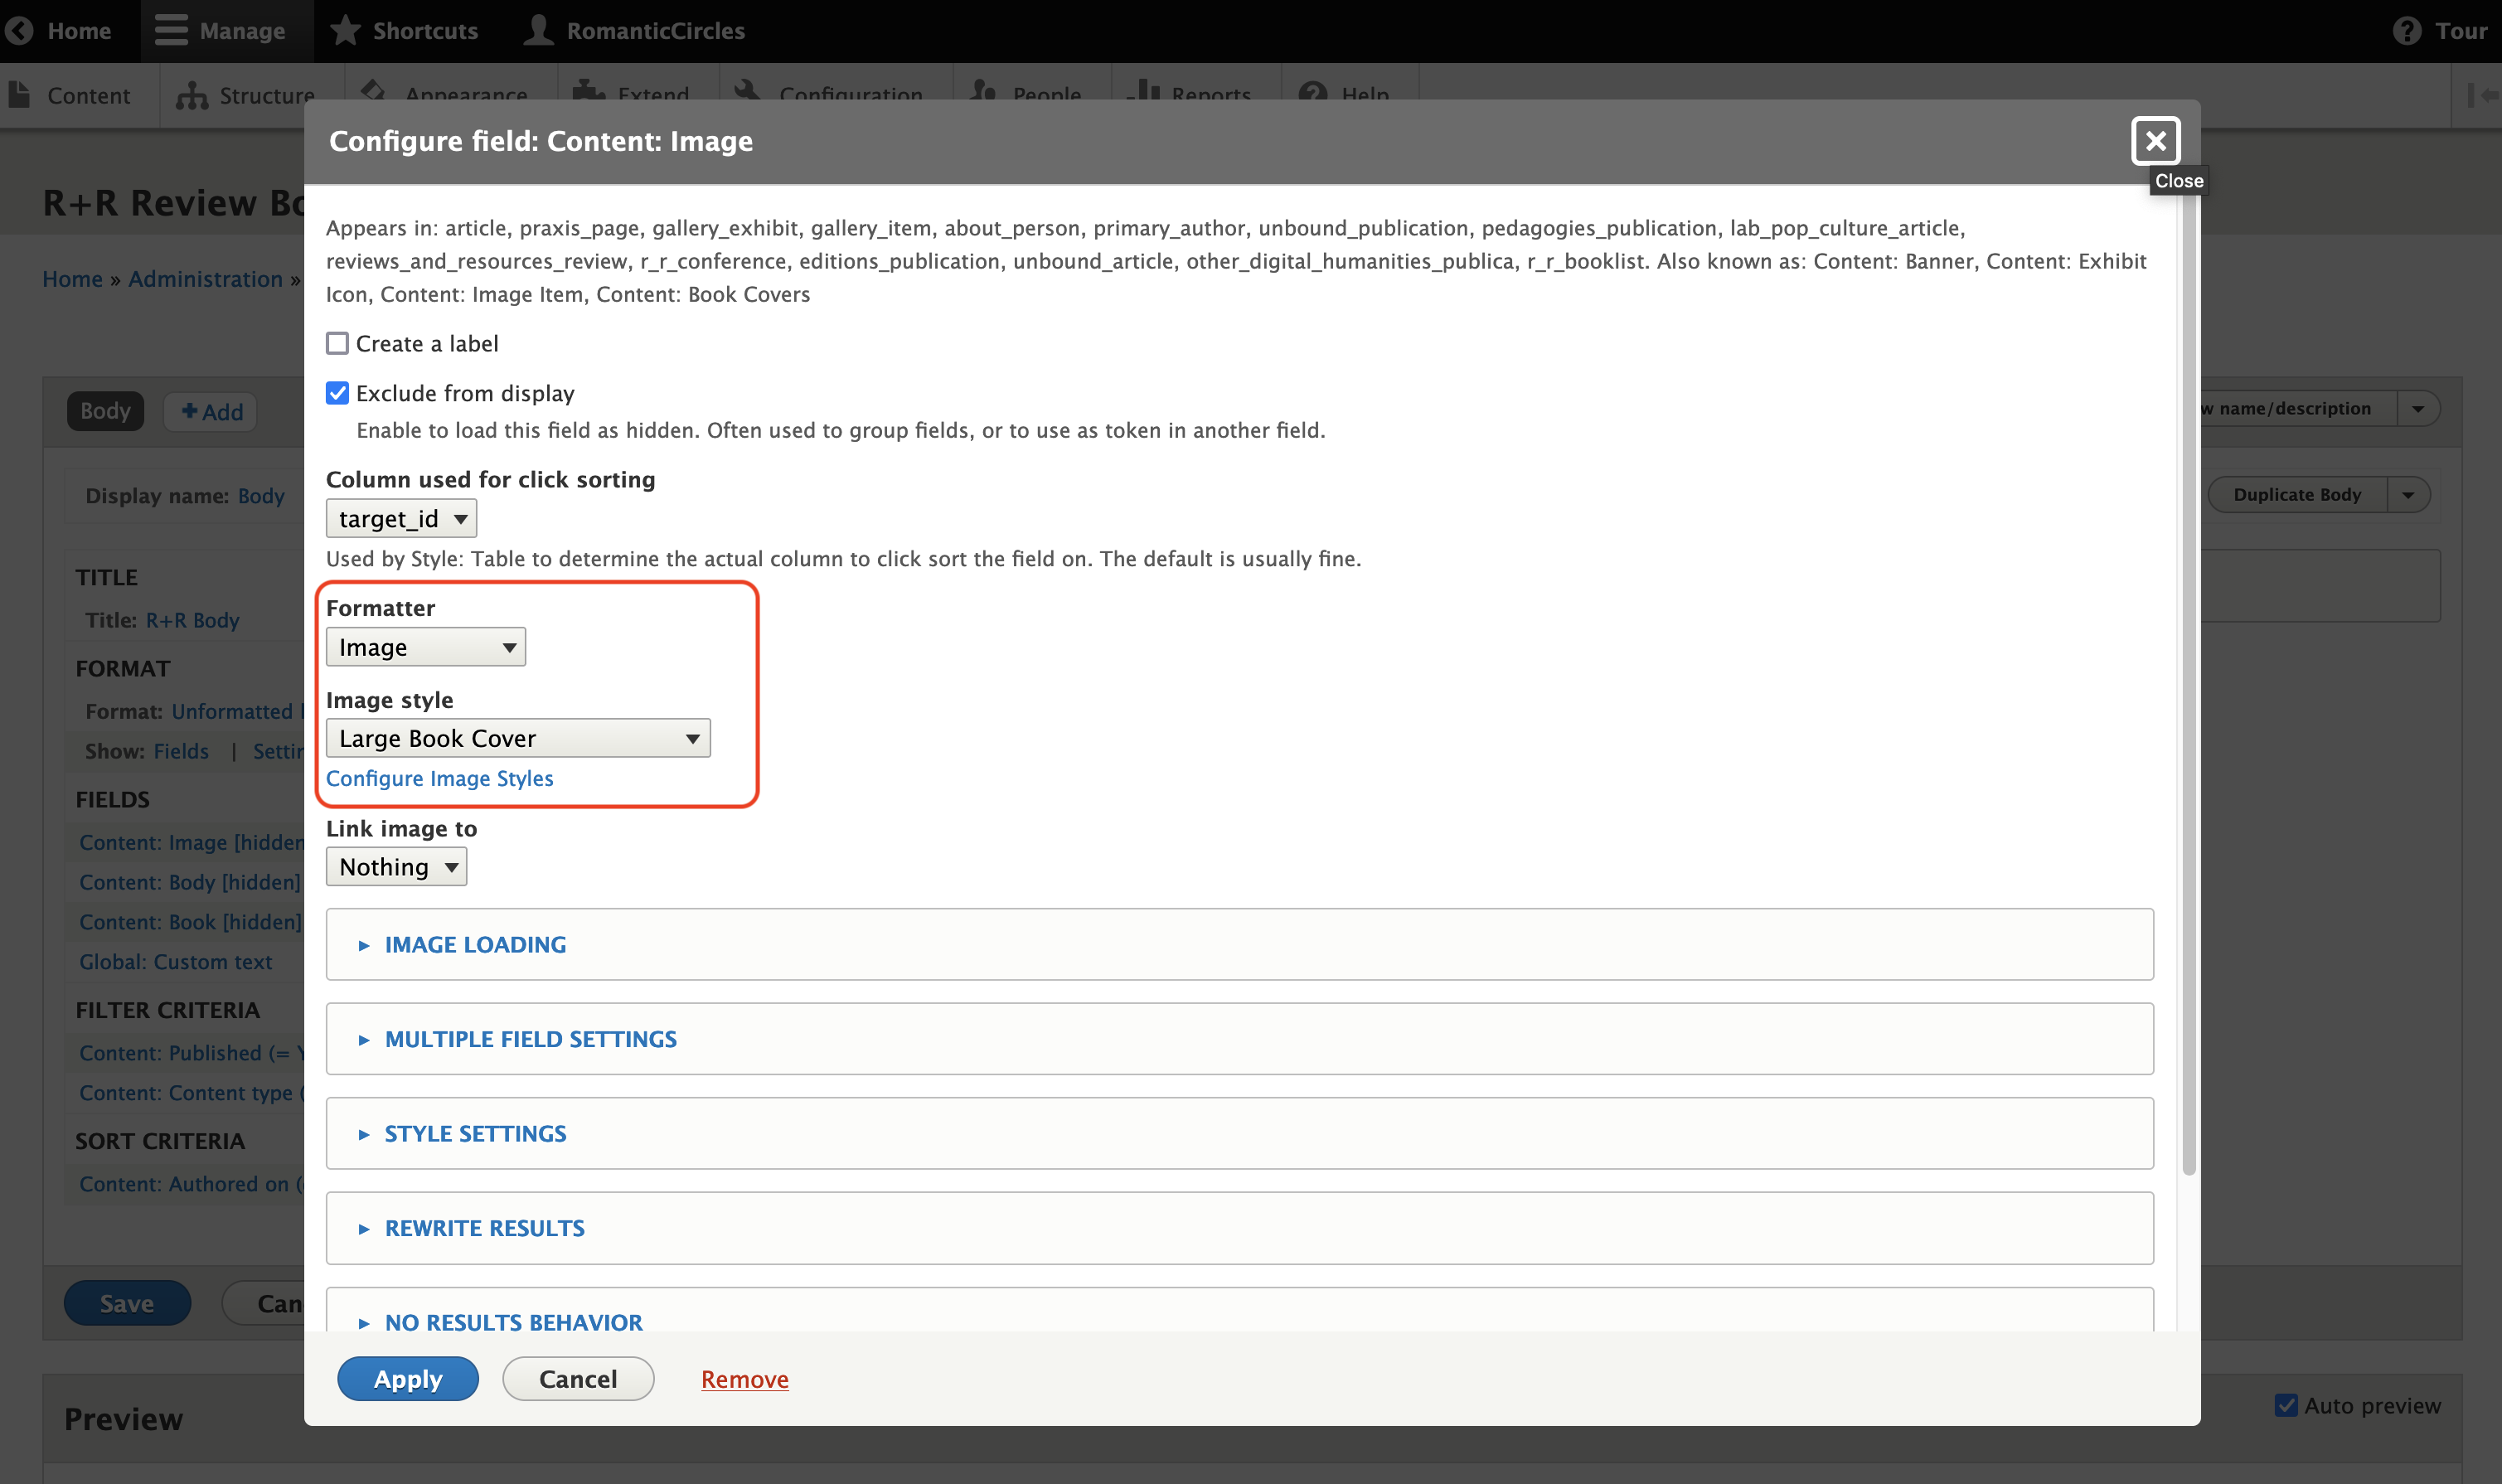
Here, at last, we see the image style created above come into play: we apply it to the field when we use it. Luckily, this view is used to create all present and future reviews, so it only needs to be configured in this way once.
Note: It’s worth noting that the view just examined uses the method described in the Views documentation of hiding fields that are “pulled” by the view and re-arranging them in custom ways using the “Custom: Global Text” field option. In this case, the image, book details, and review body are all combined via PHP “replacement patterns” that allow HTML tags with CSS classes to be inserted into the view output. This is what allows the image to appear with a formatted description under it and text wrapping around it.
Videos
RC tries to minimize the use of video content on the site, and currently does not host any video files on its servers. If a contributor, editor, or content creator wants video content included as a vital part of their work, you can simply use the embed code provided by a hosting service like YouTube or Vimeo. Simply cut and paste this HTML to the appropriate place in the HTML body of the essay or content (but be sure to select the “Full HTML” option on the WYSIWYG editor and tick the “Source” button before you do so).
Note: If the embedded video should appear with particular formatting, note that you can “tweak” the default HTML related to size and position provided by the “embed” link. If more formatting is desired, consider creating a new
<div>around the embed code and adding a CSS class that accomplishes the formatting you desire. See the Asset Injector documentation for more info on this process.
Colorbox “pop-up” functionality
Unfortunately, at present (March 2023), the Colorbox popup functionality is behaving strangely on the site. The information that follows should technically produce working popups in all cases, but in practice this has proved hit or miss. Hopefully a resolution can be found to the non-triggering of the popup function on content pages.
The RC site’s Colorbox “pop-up” (or “lightbox”) functionality is produced by 3 separate contributed modules:
- Colorbox — the main Colorbox module that provides the jQuery plugin integration into Drupal and offers a number of settings for how its “pop-up” Colorboxes appear and behave. Configurable at
Configuration / [Media] / Colorbox settings. - Colorbox Load — extends the main Colorbox module so that it can open nodes and other content (e.g., taxonomy terms) that doesn’t appear on the current page via AJAX.
- NG_lightbox — extends Colorbox Load by providing a paths interface for configuring which nodes on the site will be rendered in Colorbox lightboxes (or, if you prefer, Drupal core modals). Configurable at
Configuration / [Media] / NG Lightbox.
The settings for the Colorbox function itself is fairly straightforward, if highly customizable.
The only component here that requires configuration for new content to appear in Colorbox pop-ups is the NG Lightbox menu. This simple interface has a “Paths” field that allows you to input line-separated paths that will appear in lightboxes; as noted in the instructions, these paths must start with / and can accept the wildcard character *.
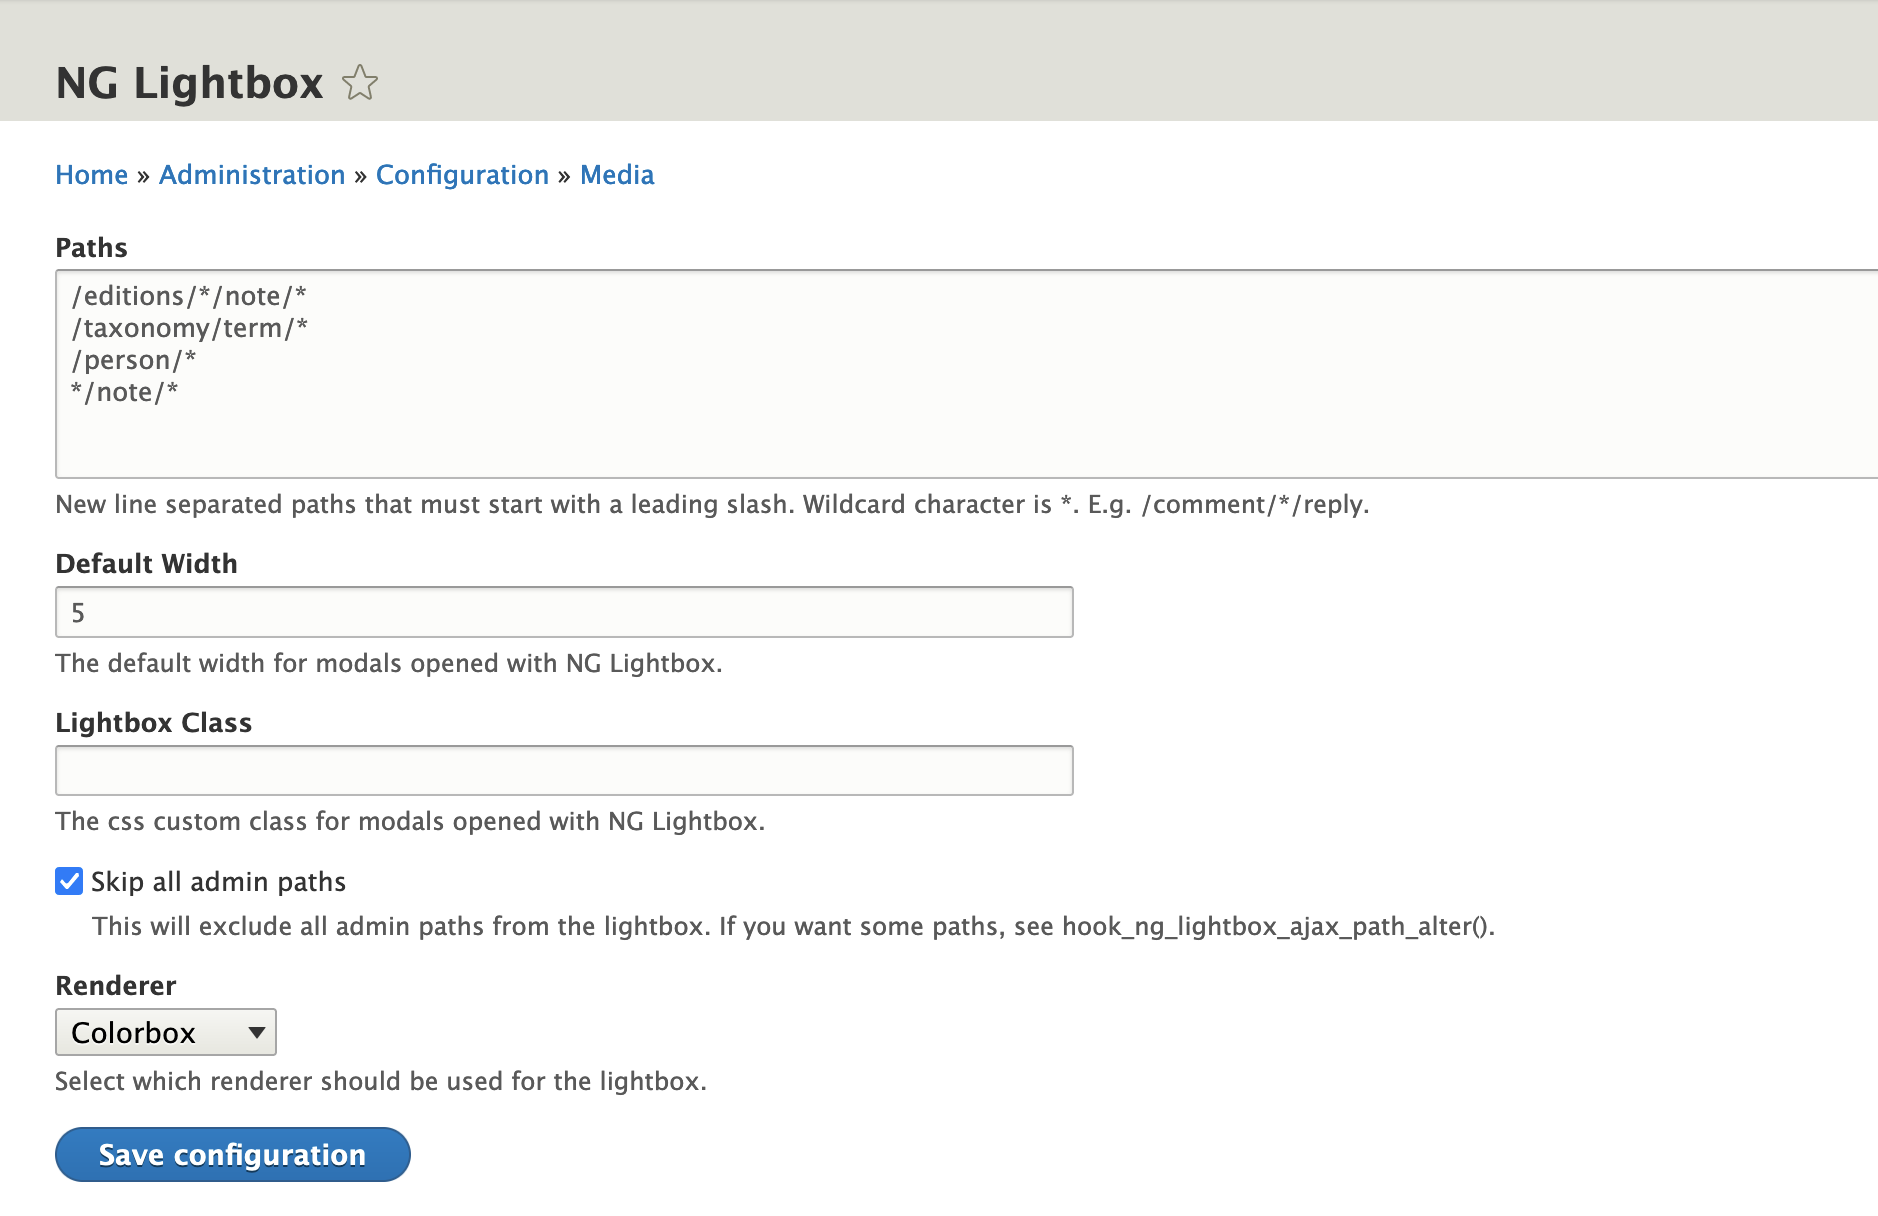
Note that the current path configuration means that any taxonomy term or contributor page will appear, whenever clicked on the site, generate a Colorbox:
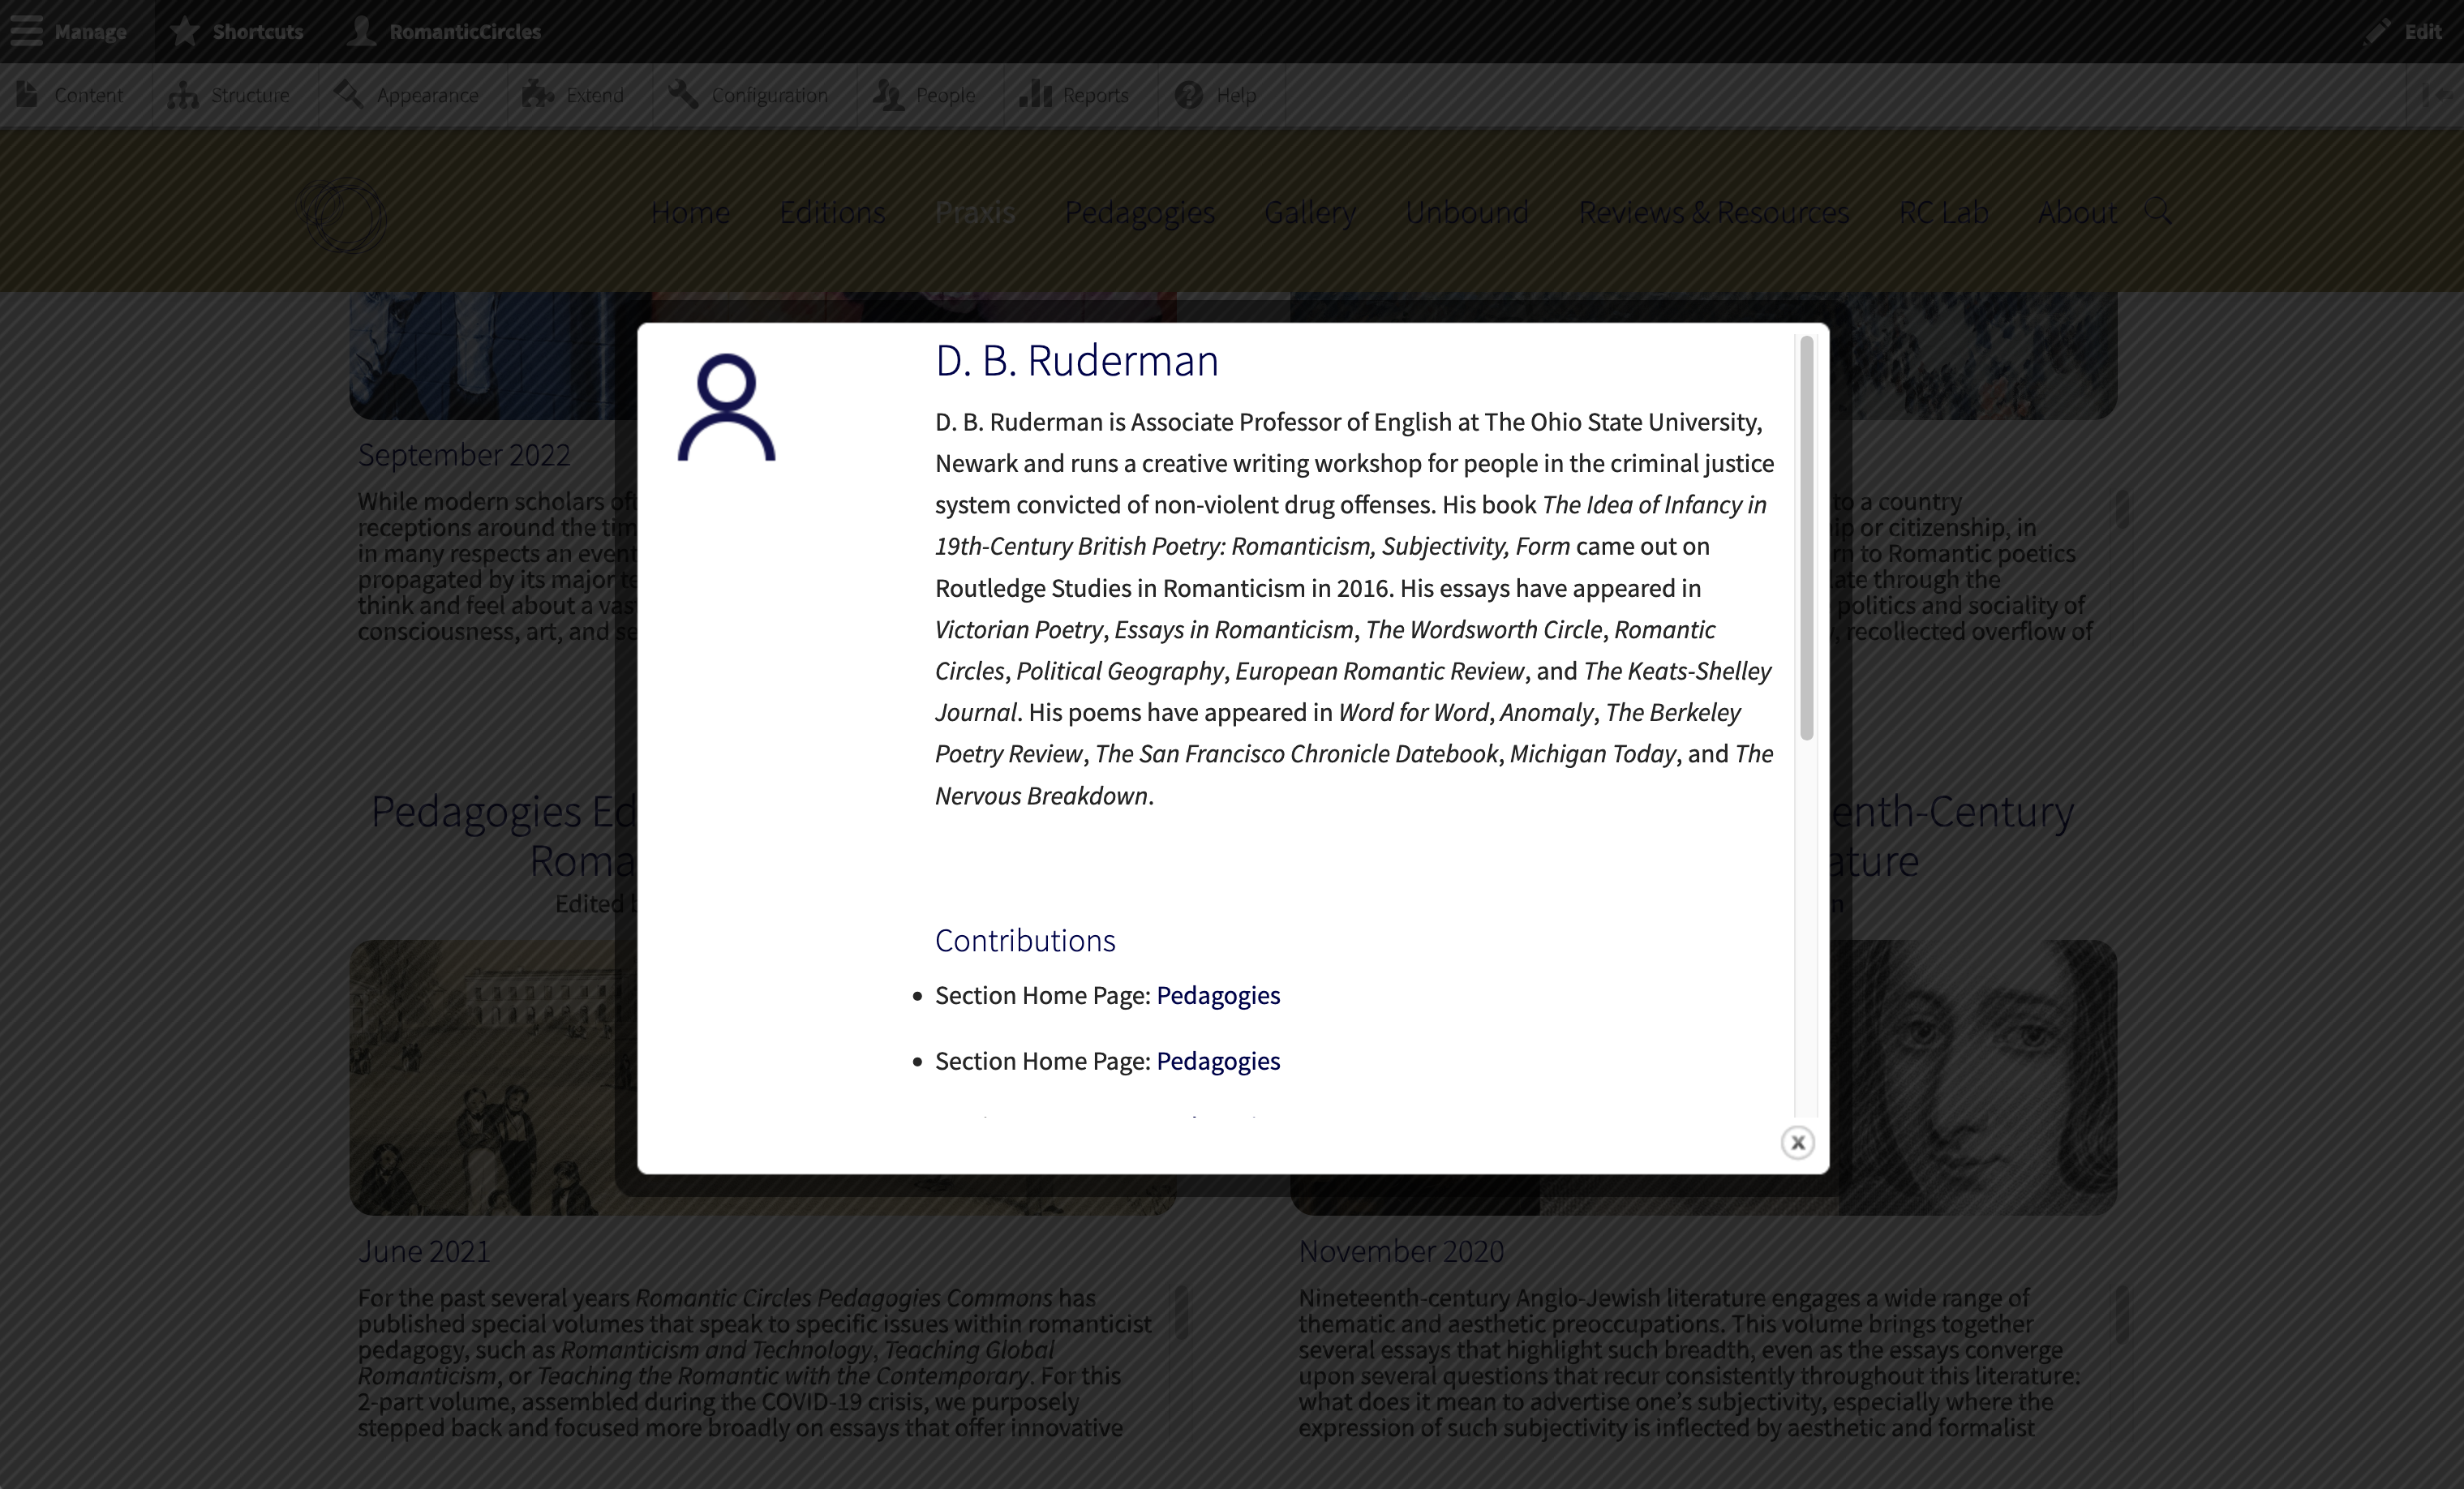
As noted above, not all intended Colorboxes on the site are functional; the “note” paths attempted in the screenshot above — which should generate Colorboxes on node-as-note content linked on individual Editions pages — have no effect at all, for an unknown reason.
Mapping: Leaflet & Geofield modules
We highly recommend you read all of the preceding Drupal documentation as a prerequisite to this section.
Like the site’s Colorbox functionality, RC’s mapping capabilities are enabled by a suite of contributed modules:
- Leaflet — the main mapping module; it ports the Leaflet JavaScript mapping library into Drupal.
- Leaflet Layers — extends the main Leaflet module to allow bundles of maps that can be layered over the main map.
- Leaflet Markercluster — actually a submodule of Leaflet that allows for regional clustering of map marker points (on zooming out of the map, for example).
- Leaflet Views — also a submodule of Leaflet; enables the “Leaflet map” output format for views on the site, meaning you can generate a Leaflet map by creating a view that retrieves geolocation data via database query.
- Geofield — Leaflet depends on this module, as it enables the inputting of Lat/Long data fields into Drupal content types.
Note: Because the “Markercluster” and “Views” submodules described above are submodules of the main Leaflet module (generally meaning they were originally developed as separate modules and then merged into the development of the main module’s code), they will not appear as individual entities required in Composer’s
composer.jsonfile. Rest assured that their dependencies and updates are still tied to your overall Drupal installation through the main Leaflet module. See the Composer documentation for more info.
The creation of a map on the site incorporates basically every element of Drupal this documentation has covered thus far. Thus a walkthrough of this process is in order, as it also serves as a concrete illustration of many of the principles we’ve been discussing over these many pages. It may be helpful to begin by outlining the logics that leverage different Drupal components and functions to successfully produce a map.
Mapping logics: Content type + taxonomy vocabulary + entity references + feeds importers + views
The elements/entities necessary to produce a Leaflet map on the RC site are as follows:
- NODES of the “landmark” content type. The landmark node holds the geofield data for each place on the map. Its field configuration is quite simple: you can give the place a name (“landmarkTitleField”), a description (“Description”), and latitude and longitude coordinates (“Location”).
- Vitally, the landmark field can also accept two entity reference fields: the “Place Anchor Tag” and the “Parent Resource.” The latter is rather self-explanatory: the parent resource field should hold the main parent page (TOC/index page) for the edition/volume the map belongs to. The “Place Anchor Tag” field will hold the landmark node’s equivalent taxonomy term.
- TERMS belonging to the “places” taxonomy vocabulary. For each “landmark” location, a taxonomy term of the same name will be imported alongside the landmark title and other fields, into the “Place Anchor Tag” field. This is an entity reference field that links the landmark node to the place’s taxonomy term. This same term can be referenced by any other content on the site, usually by a “Places mentioned on this page” field on an “Editions article” node.
- FEEDS are used to auto-populate all these fields. As described in the Feeds Importer technical documentation and the Content Import production documentation, the feeds importers can be configured to parse (via XPath) XML documents and retrieve data. RC uses feeds importers to populate all the fields mentioned above from TEI files. For all the importer logics that go into building a complex mapping ecosystem in Drupal, see the configuration of the “Landmark Importer” and the “Place Taxonomy Importer” at
Structure / Feed Types.- For the importer used to populate the terms on an “Editions article” content type, also see, e.g., the “Southey Letters Importer.”
- ENTITY REFERENCES tie everything together. The “Place Anchor Tag” entity reference field on the “landmark” node and the “places mentioned” entity reference field on the “Editions article” node allow each term in the “Places” vocabulary to generate a list of every entity reference across the site that points to this particular term. Drupal’s Taxonomy system does this automaticaly; if you click on a term, it will list its appearances everywhere on the site. This functionality can be leveraged through views.
- VIEWS are used to present all the data on Leaflet’s mapping interface. By choosing to output a view’s query as a “Leaflet Map” format and pulling in the relevant geolocation fields, you can generate a Leaflet map.
Leaflet mapping walkthrough
Once you understand the content logics outlined above, the steps required to build a Leaflet map should make sense.
Import content / geolocation data into the “landmark” content type.
- All “place” entries for a given project should be provided in a single XML (TEI) file, usually called
places.xmlor similar. This file normally will contain a series of hierarchically parallel XML tags that provide various datapoints about the place, a place name and lat/long coordinates at minimum. Usually you’ll see a description and ID (xml:id) as well. - Import taxonomy terms. Navigate to
Content / Feedsand edit the Place Taxonomy Importer. Upload your XML file and run the import.- This importer extracts the “ID” name for each place and turns it into a taxonomy term (the term will automatically be created upon import). This taxonomy term “logs” every time the term appears in any entity reference field across the site and can display all references to each location.
- If the import fails, it probably means that your XML file doesn’t conform to the conventions outlined in our TEI guidelines. You have two options: modify the XML via find-and-replace queries, or edit the importer’s parsing configuration. The latter is usually far less time consuming. See the Feeds documentation and XPath tips in the RC Languages Guide for how to do so. Make sure you write down the previous configuration and return the feed to its defaults once you’re done.
- Change the parent resource for the place node import. Next, import the actual content for each place. Navigate to
Structure / Feed typesand edit the Landmark Importer. In the “Tamper” tab, edit the plugin value assigned to the “Placeholder -> Parent Resource: target_id” mapping (at the bottom of the page, click “edit” next to the “Set value or default value” plugin). Change the value to the node ID or exact name of the parent volume and save the feed type. (To find the node ID, simply navigate to the edition’s TOC page and hover your mouse over the “edit” tab; the node ID number will appear in the URL at the bottom left corner of the browser.) - Import place nodes. Finally, navigate back to
Content / Feedsand edit the Landmark Importer to upload the sameplaces.xmlfile you just used to import the taxonomy terms. Run the importer. This creates and populates the actual place nodes, including the place name, description, taxonomy entity reference, and, vitally, each place’s lat/long coordinates.
Build the map as a view.
- Navigate to
Structure / Viewsand create a new view. Give the view a meaningful name. - Under “View settings,” set it to show Content of type Landmark.
- Under “Page settings,” check “Create a page” (to set the display to “page” instead of “block”). Set the page title as appropriate and give it a relative path inside its parent volume (e.g., /editions/southey_letters/places-map).
- Click “Save and edit.” This will take you to the proper views interface.
- The first item in the “Fields” section should be “Content: Location”. If necessary, remove an element and then add the “Content: Location” field by searching for it. Probably you’ll want to pull in the place title as well; add the field “Content: Title” and check “Link to the content” from the options (when you click on the field name).
- Add a filter to the view: “Parent resource is equal to [node ID].” You’ll need to provide the 6-digit node id for your map’s parent resource; see the importation guide just above for how to find it.
- In the “Format” section, click the “Settings” option next to “Fields.” Check the box next to “Content: Location” to set it as an inline field.
- Save the view. You should see the Leaflet map populate in the “Preview” section, and the link created by the view should work. Congrats!
Advanced options
Map Layers: Navigate to Structure / Leaflet Layers there is an option for map layers. If your project requires (often historical) map overlays over the standard Leaflet map, you create them here. To import a map layer for use by Leaflet, you’ll first need to convert the scanned image of the map — preferably a high-res IIIF-compatible image file — into XYZ map tiles. There are several online services that will do this for you; see, e.g., Allmaps. Once you have folders of XYZ tiles, you’ll upload them to the SFTP and then point the Leaflet map tile configuration to that file location as a relative URL (/sites/default/files/…). The best way to figure this out will be to examine the configuration of map layers that already exist on the site; for an example of a Leaflet map with layer overlays, see the Guide to the Lakes map.
Map Bundles: To include specific map overlays in a final Drupal map (view), a map bundle must be made. Under Structure / Leaflet layers / Map bundles, you can create a bundle which lets you select which maps you want to include and which you want to be enabled/disabled by default. To enable a bundle on a specific map (or to enable a single layer, if that’s all you need), edit the view responsible for outputting the map and click “Settings” next to “Leaflet Map” under the “Format” section. From this dialog, select the bundle you just created from the “Leaflet Map Tiles Layer” field. You should now see the “Layers” tooltip in the top-right of the resulting Leaflet map; hopefully all layers you put into the bundle show up correctly! (If they don’t, try a different XYZ map tile creator and re-create the layers.)